How to Sharpen Bypass Pruners [In 2025]
Sharpening bypass pruners is essential for clean, precise cuts. Dull pruners can damage plants and make gardening difficult.
In this guide, we will explore how to sharpen bypass pruners effectively. Keeping your pruners sharp ensures better performance and healthier plants. Whether you are an experienced gardener or a beginner, sharpening your tools is key. This process is simple and can be done with basic tools.
By following these steps, you will prolong the life of your pruners. Let’s dive into the details and help you maintain your gardening tools.
Choosing The Right Tools
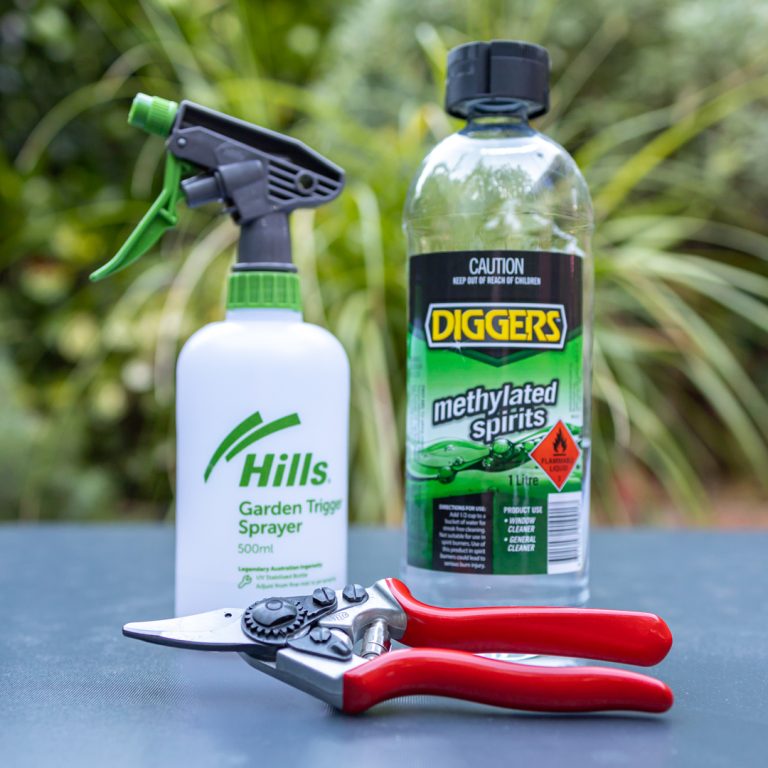
Choosing the right tools is crucial for sharpening your bypass pruners effectively. Using the correct equipment will ensure a sharp edge and prolong the life of your pruners. Let’s explore the essential tools and optional accessories you might need.
Essential Tools
To sharpen your bypass pruners, you need a few key tools. First, get a sharpening stone. A medium-grit stone works best. Next, you will need a pair of gloves. This keeps your hands safe while working. Finally, have a clean cloth handy. Use it to wipe the pruners after sharpening.
Optional Accessories
Some accessories make the sharpening process easier. Consider using a clamp or vise. It helps hold the pruners steady. A magnifying glass is also useful. It allows you to see the blade edge clearly. A lubricant or honing oil can be helpful too. It keeps the sharpening stone smooth and effective.

Credit: www.sharpeningsupplies.com
Disassembling The Pruners
Sharpening your bypass pruners requires careful disassembly. This ensures that you can access all parts effectively. Proper disassembly is the first step to achieving a sharp and precise blade. Below, we break down the process into two main steps for easy understanding.
Removing The Blade
First, gather the necessary tools. You will need a screwdriver and possibly a wrench. Follow these steps:
- Locate the screw that holds the blade in place.
- Use a screwdriver to carefully remove the screw.
- Gently separate the blade from the pruner handle.
Ensure you keep the screw and any small parts in a safe place. Losing these can make reassembly difficult.
Handling Other Parts
After removing the blade, other parts need attention:
- Springs: Check the condition of the springs. Replace if worn out.
- Bolts and Nuts: Clean these thoroughly to remove any dirt or rust.
- Handles: Inspect for damage. Clean them for better grip.
Proper care of each part ensures the pruners function well after sharpening. Keeping parts organized makes reassembly easier.
Refer to the table below for a quick overview of the tools needed:
| Tool | Purpose |
|---|---|
| Screwdriver | Remove screws |
| Wrench | Loosen nuts |
Cleaning The Pruners
Properly cleaning your bypass pruners is essential before sharpening them. Clean tools cut better and last longer. Begin with a thorough cleaning to remove dirt and rust.
Removing Dirt And Debris
Start by wiping the pruners with a damp cloth. This removes loose dirt and grime. For tougher spots, use a soft brush. A toothbrush works well for this.
- Soak the pruners in warm, soapy water.
- Scrub all parts thoroughly.
- Rinse with clean water.
- Dry with a clean towel.
Ensure every part is dry before moving to the next step. This prevents rust from forming.
Using Rust Removers
Rust can damage your pruners and affect their performance. Use a rust remover for best results.
- Apply the rust remover to the affected areas.
- Let it sit for the recommended time.
- Scrub the rust off with steel wool or a wire brush.
- Wipe the pruners clean with a cloth.
Repeat if necessary. Ensure no rust remains on any part of the pruners.
After cleaning and rust removal, your pruners are ready for sharpening. Clean tools make the sharpening process more effective and efficient.

Credit: www.youtube.com
Sharpening The Blade
Sharpening the blade of your bypass pruners is essential for maintaining their efficiency. A sharp blade ensures clean cuts, which is healthier for plants. Let’s explore the steps to achieve a sharp blade.
Using A Sharpening Stone
Using a sharpening stone is one of the best methods to sharpen your pruner’s blade.
- First, clean the blade with soapy water to remove any dirt.
- Dry the blade thoroughly to prevent rust.
- Place the stone on a flat surface.
- Hold the pruner at the correct angle.
- Move the blade across the stone in a circular motion.
Repeat this process until the blade is sharp. Always use a firm grip to ensure safety.
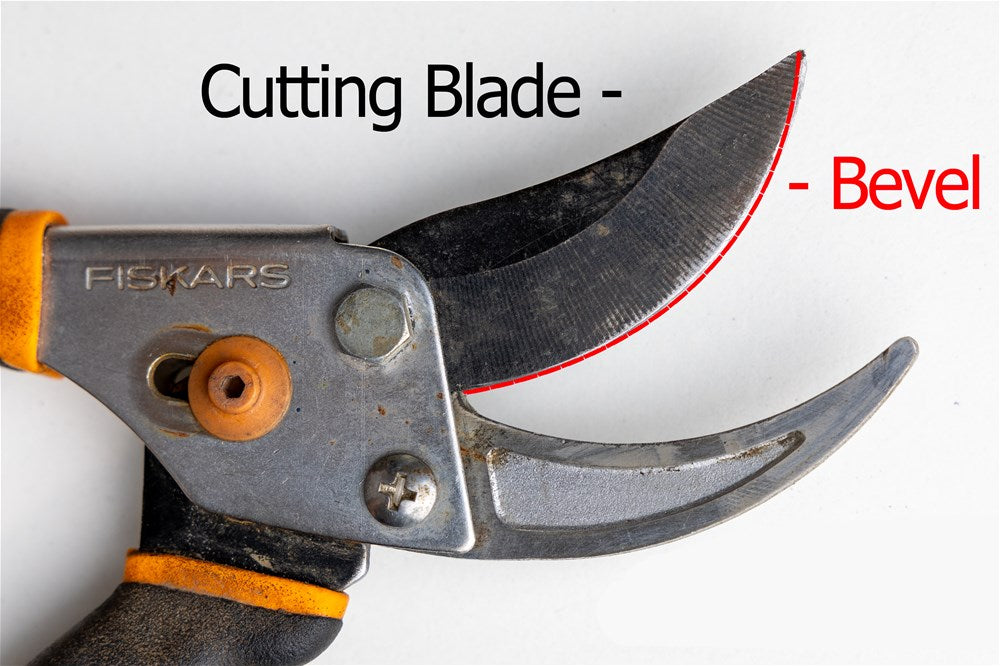
Maintaining The Correct Angle
Maintaining the correct angle is crucial for effective sharpening. The recommended angle is usually 10 to 20 degrees.
| Type of Pruner | Recommended Angle |
|---|---|
| Standard Bypass Pruners | 10-15 degrees |
| Heavy-Duty Bypass Pruners | 15-20 degrees |
To maintain the angle, use a guide or steady your hand. This helps achieve a precise and sharp edge. Remember, consistency is key.
Polishing The Blade
After sharpening bypass pruners, polishing the blade is essential. This step ensures a clean cut and prevents rust. Polishing also extends the lifespan of your pruners. Let’s dive into the process.
Smoothing Rough Edges
Start by smoothing any rough edges on the blade. Use a fine-grit sandpaper for this task. Rub the sandpaper gently along the blade’s edge. Focus on areas that feel rough to the touch.
Continue until the blade feels smooth. Smoothing rough edges helps the blade cut more efficiently. It also reduces the risk of damaging plants.
Applying A Polishing Compound
Next, apply a polishing compound to the blade. Choose a compound designed for metal. Apply a small amount to a soft cloth. Rub the cloth along the blade in small circles.
Work the compound into the metal. This process removes any remaining rough spots. It also gives the blade a shiny finish.
Once polished, wipe the blade with a clean cloth. This step removes any residue from the compound. Your pruners should now look and perform like new.
Reassembling The Pruners
Reassembling your pruners properly is crucial for their smooth operation. After sharpening, the next step is to put them back together. This process involves reattaching the blade and tightening the screws and bolts. Follow these steps to ensure your pruners work like new.
Reattaching The Blade
Begin by aligning the blade with the pruner handle. Ensure the blade fits snugly into its designated slot. Misalignment can cause cutting issues.
- Place the blade in its correct position.
- Insert the pivot bolt through the blade and handle.
- Ensure the blade moves smoothly.
Check for any wobbling or gaps. The blade should be tight yet flexible enough for smooth movement.
Tightening Screws And Bolts
Next, tighten the screws and bolts to secure the blade. Use the appropriate screwdriver or wrench for your pruners.
- Locate all screws and bolts.
- Start with the pivot bolt. Tighten it securely.
- Move to the smaller screws on the handles.
Avoid over-tightening, which can restrict movement. The pruners should open and close easily.
| Step | Action |
|---|---|
| 1 | Align the blade with the handle |
| 2 | Insert and tighten the pivot bolt |
| 3 | Secure smaller screws |
Now, test your pruners. Cut through a piece of paper or a small branch. If the cut is clean and smooth, your pruners are ready for use.
Lubricating The Pruners
Properly lubricating the pruners keeps them sharp and easy to use. It reduces friction and prevents rust. Regular maintenance ensures efficient cutting.
Lubricating your bypass pruners is essential for smooth operation. It reduces friction and prevents rust. This process extends the life of your tools. Regular lubrication ensures clean cuts and easy handling.Choosing The Right Lubricant
Select a lubricant designed for garden tools. A light machine oil works well. Avoid heavy oils or grease. They can attract dirt and cause buildup. Products like WD-40 are also good choices. Ensure the lubricant is suitable for metal parts.Applying Lubrication
First, clean the pruners thoroughly. Remove dirt and sap with a cloth. Apply a few drops of oil to the moving parts. Open and close the pruners to spread the oil. Wipe off any excess lubricant. This prevents dirt from sticking. Regular lubrication keeps your pruners in top shape. “`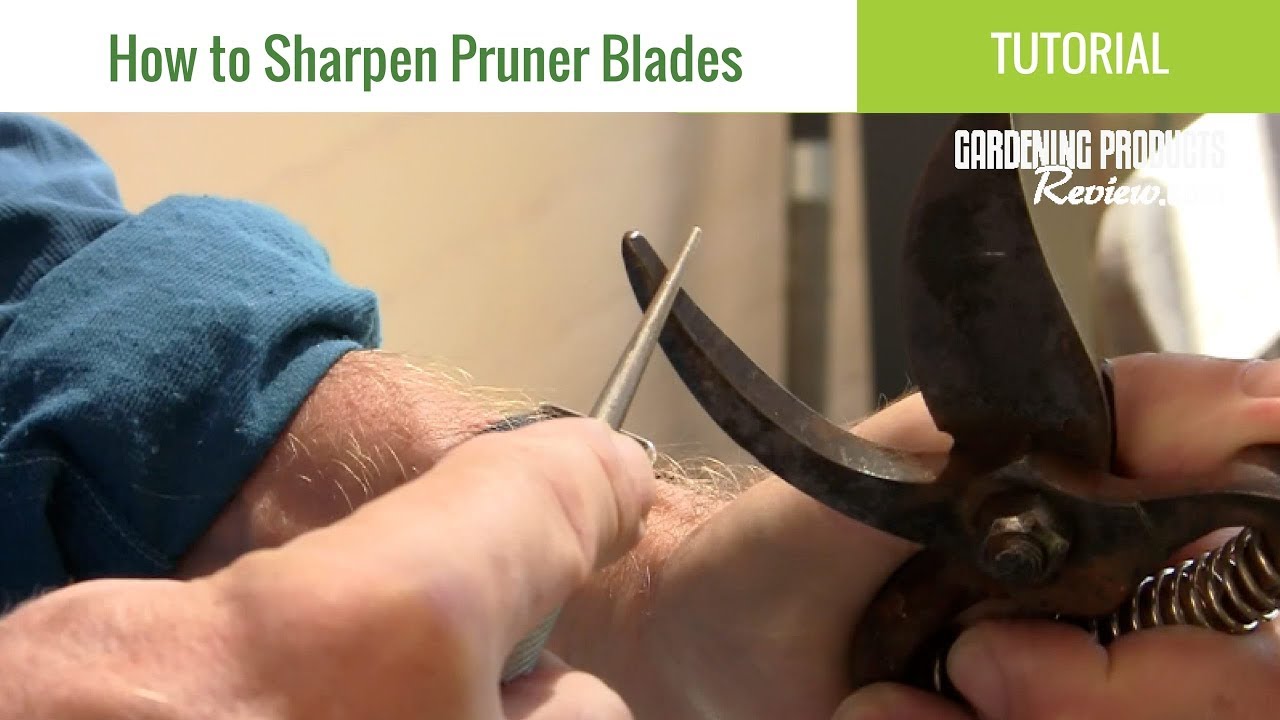
Credit: www.youtube.com
Maintaining Sharpness
Maintaining the sharpness of your bypass pruners is essential for efficient gardening. Sharp blades ensure clean cuts, which promote plant health. Regular upkeep of your pruners will also prolong their lifespan. Let’s explore how you can maintain the sharpness of your bypass pruners.
Regular Cleaning
Clean your bypass pruners after every use. Remove any plant sap, dirt, and debris. Use soapy water and a soft brush for this task. Dry the pruners completely to prevent rust. Regular cleaning keeps the blades sharp and ready for use.
Proper Storage
Store your pruners in a dry place. Moisture can cause rust, dulling the blades. Use a protective cover or case to keep the pruners safe. Proper storage helps maintain sharpness and ensures your pruners last longer.
Frequently Asked Questions
What Is The Best Tool To Sharpen Pruners?
The best tool to sharpen pruners is a diamond hand file. It offers precision and durability for clean cuts.
How To Sharpen A Bypass Lopper?
To sharpen a bypass lopper, first clean the blades. Use a file or sharpening stone to hone the edges. Maintain the original bevel angle. Finish by oiling the blades to prevent rust.
What Kind Of File To Sharpen Pruning Shears?
Use a mill file to sharpen pruning shears. Choose a flat, fine-toothed file for precise sharpening.
How To Sharpen Garden Shears Without A File?
Use a sharpening stone or whetstone to sharpen garden shears. Clean blades, hold at an angle, and stroke evenly.
What Tools Do I Need To Sharpen Bypass Pruners?
You need a sharpening stone, file, and clean cloth.
Conclusion
Sharpening bypass pruners doesn’t have to be difficult. Regular maintenance ensures clean cuts. Clean blades prevent plant diseases. Use a file or sharpening stone. Remember to wear safety gloves. Store pruners in a dry place. Consistent care extends their lifespan.
Enjoy healthier plants and easier pruning. Happy gardening!