How to Sharpen Pruners With a File [A Step-by-Step Guide]
Sharpening pruners with a file is simple and effective. It restores the tool’s cutting edge for better performance.
Pruners are essential for garden maintenance. Over time, they become dull and inefficient. Regular sharpening keeps them in prime condition, ensuring clean cuts and healthy plants. Using a file to sharpen pruners is a straightforward process. It requires minimal tools and effort.
This guide will walk you through the steps. You’ll learn how to identify dull blades, choose the right file, and sharpen your pruners effectively. With a bit of practice, you’ll keep your pruners sharp and ready for any garden task. Sharpening your pruners ensures they last longer and work better. Ready to give your pruners a new edge? Let’s get started!
Gather Necessary Tools
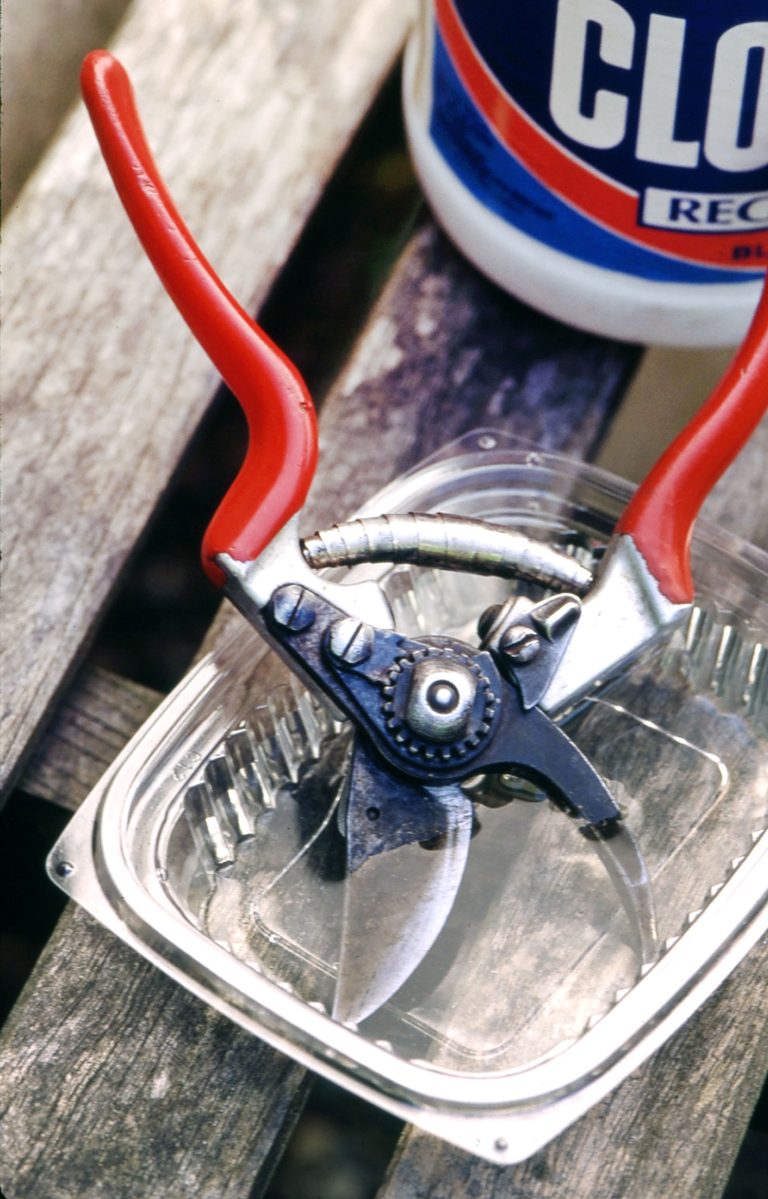
Before you start sharpening your pruners, it is important to gather the necessary tools. Having the right tools will make the job easier and ensure a proper sharpening process. Below, you will find a detailed guide on the tools needed to sharpen your pruners effectively.
File Selection
Selecting the right file is crucial for sharpening your pruners. Different types of files are available, but for pruners, a flat mill file is the best choice. Ensure the file is clean and free from rust. A file with a comfortable handle will be easier to use and provide better control.
| Type of File | Best Use |
|---|---|
| Flat Mill File | Sharpening pruners |
| Round File | Sharpening chainsaw blades |
| Half-Round File | General sharpening tasks |
Safety Gear
Using the right safety gear is essential while sharpening your pruners. Always wear safety gloves to protect your hands from cuts and abrasions. Safety glasses are also important to shield your eyes from flying metal particles.
- Safety Gloves: Protect your hands from injury.
- Safety Glasses: Shield your eyes from debris.
Wearing these safety items will help you avoid accidents and injuries during the sharpening process.
Now that you know about the essential tools, you are ready to sharpen your pruners safely and effectively. Having the right file and safety gear will make the task straightforward and safe.
Credit: www.youtube.com
Disassemble Pruners
Disassembling pruners is essential for a thorough sharpening. This ensures every part gets the attention it needs. By taking apart the pruners, you can clean and inspect each component. This step-by-step guide will help you disassemble your pruners correctly.
Identify Parts
Start by identifying all the parts of your pruners. Typically, pruners have two main blades, a handle, and a bolt. Knowing each part will make reassembly easier.
| Part | Description |
|---|---|
| Main Blade | The sharp, cutting part of the pruners. |
| Counter Blade | The part that holds the branch while cutting. |
| Handle | Where you hold and control the pruners. |
| Bolt | Keeps the blades and handles together. |
Remove Bolts
To disassemble pruners, start by removing the bolts. Use a wrench to loosen the bolts. Turn the wrench counterclockwise until the bolt comes off completely. Keep the bolts in a safe place to avoid losing them.
Once the bolts are removed, gently separate the blades and handles. Be cautious to avoid any damage. With all parts disassembled, you can now proceed to clean and sharpen each piece.
Clean Pruner Blades
Keeping pruner blades clean is essential for their longevity and performance. Dirty blades can harbor bacteria and rust, which affects their cutting efficiency. Before sharpening, ensure your pruners are free from any grime or sap.
Use Cleaning Solution
First, prepare a cleaning solution. Mix dish soap with warm water in a small container. Dip a soft cloth or sponge into the solution. Wipe down the pruner blades thoroughly. This removes dirt and sap buildup. For stubborn grime, use a small brush.
Dry Thoroughly
After cleaning, it is crucial to dry the blades completely. Use a clean, dry cloth to wipe off any remaining moisture. Ensure there is no water left on the blades to prevent rust. Proper drying extends the lifespan of your pruners.
Examine Blade Condition
Before sharpening pruners, it is important to examine the blade condition. This step ensures that you address the specific needs of your tool. A thorough inspection will help you identify areas needing attention.
Check For Nicks
Look closely at the blade’s edge. Small nicks and dents can affect cutting performance. Use a magnifying glass if necessary to see all imperfections. Mark the spots needing extra care with a marker.
Assess Blade Alignment
Check if the blades line up correctly. Misalignment can cause uneven cuts. To check, close the pruners and see if the blades touch evenly. If they don’t, you may need to adjust them before sharpening.
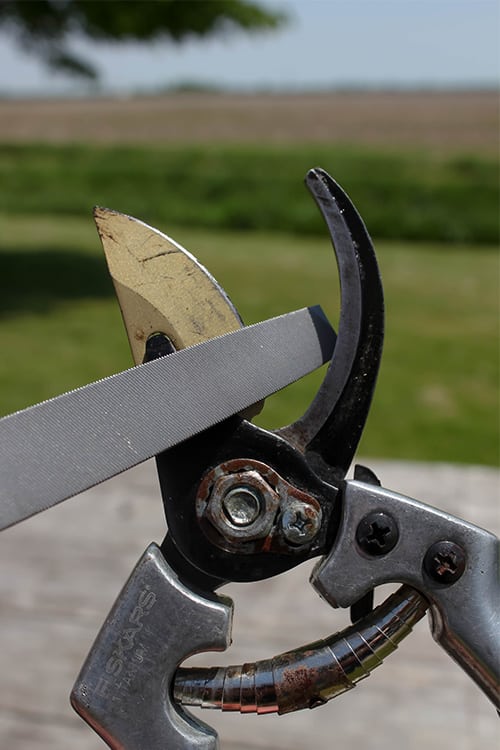
Sharpen The Blade
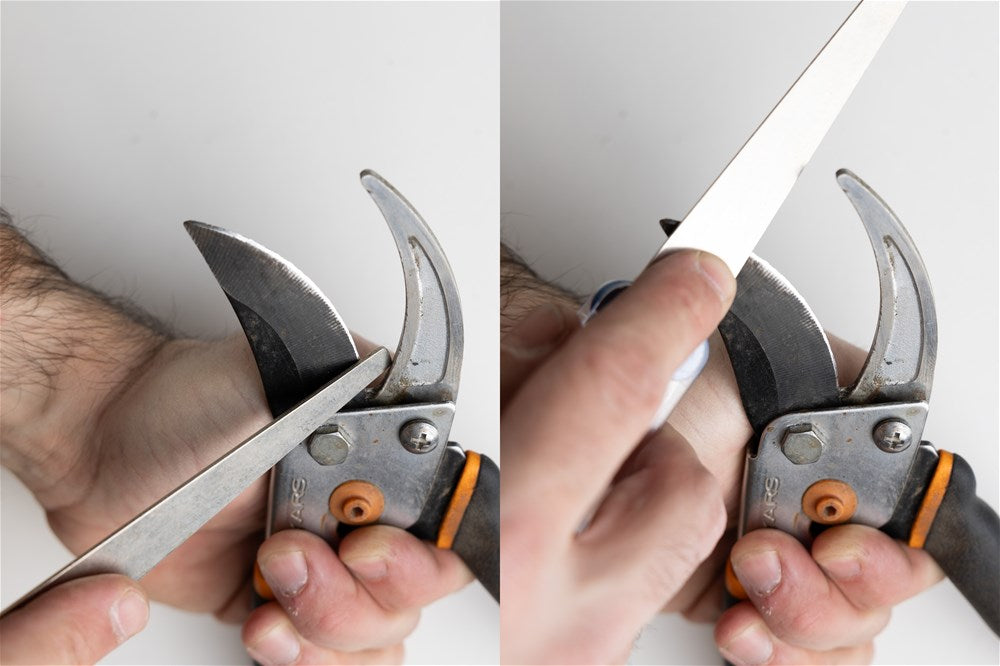
Sharpening the blade of your pruners keeps them effective and safe. A sharp blade makes cleaner cuts and reduces plant damage. Here’s how to sharpen your pruners with a file.
Angle The File
First, hold the pruners steady in one hand. Use a vice if available. Position the file at the same angle as the blade edge. Most pruners have a bevel angle of about 25 degrees.
Maintain a steady angle throughout the sharpening process. An inconsistent angle can damage the blade.
Consistent Strokes
Next, use long, consistent strokes with the file. Start from the base of the blade and move towards the tip. Use even pressure during each stroke.
Repeat this process until you see a shiny, sharp edge. Avoid using short or uneven strokes as they can create nicks in the blade.
Check the blade sharpness periodically. Stop filing once the blade is sharp enough for clean cuts. Use a piece of paper to test the sharpness.
Summary Table
| Step | Description |
|---|---|
| Angle the File | Hold at 25 degrees and maintain a steady angle. |
| Consistent Strokes | Use long, even strokes from base to tip. |
Credit: www.creeklinehouse.com
Reassemble Pruners
After sharpening your pruners, the next step is reassembling them. This process ensures your pruners function correctly and are ready for use. Follow these simple steps to reassemble your pruners efficiently.
Align The Parts
Start by aligning the parts of your pruners. Place the two blades together. Make sure the sharp edges face each other. Position the spring between the handles. Check that all parts fit snugly.
Tighten Bolts
Next, tighten the bolts on your pruners. Use a screwdriver or wrench. Turn the bolts clockwise until they are secure. Ensure the blades move smoothly. Adjust the tension if needed.
Test Sharpness
After sharpening your pruners, it’s time to test their sharpness. This step ensures your pruners are ready for the garden. Testing the sharpness can prevent any damage to your plants.
Cut Test
First, find a piece of paper or a small branch. Try cutting through it with your pruners. The cut should be clean and smooth. If the pruners struggle or tear, they need more sharpening.
Adjust If Needed
If the cut test fails, check your pruners for any issues. Look for dull spots or nicks on the blade. Sharpen these areas again with your file. Repeat the cut test until the pruners cut smoothly.
Maintenance Tips
Maintaining your pruners is crucial for their longevity and performance. Regular upkeep prevents rust and ensures clean cuts. Following these tips will keep your pruners in top shape.
Regular Cleaning
Wipe your pruners after every use. Remove sap and dirt using a damp cloth. Dry them thoroughly to prevent rust. For stubborn residues, use a mixture of soap and water. Rinse well and dry completely.
Proper Storage
Store your pruners in a dry place. Use a protective sheath or case. Avoid leaving them outside. Exposure to moisture leads to rust. Hang them on a pegboard or store them in a toolbox. This keeps them safe and easy to find.

Credit: www.creeklinehouse.com
Frequently Asked Questions
What Is The Best Way To Sharpen Garden Pruners?
Sharpen garden pruners with a sharpening stone. Clean blades, then run the stone along the edge at a 20-degree angle.
How To Sharpen A Spade With A File?
Sharpen a spade with a file by securing it in a vice. File the edge at a 45-degree angle. Use smooth, even strokes. Repeat until sharp.
How To Sharpen Shears With A File?
Clamp the shears tightly. Use a flat file to sharpen the blade at a 10-15 degree angle. File in one direction. Repeat on the other blade. Clean and oil the shears after sharpening.
What Kind Of File Do You Use To Sharpen Hedge Trimmer Blades?
Use a flat file or a mill file to sharpen hedge trimmer blades. Ensure the file matches the blade size for effective sharpening.
What Tools Do I Need To Sharpen Pruners?
You need a file, gloves, and a clean cloth.
Conclusion
Sharpening pruners with a file is simple and effective. Regular maintenance keeps your pruners in top shape. Clean your tools before sharpening. Use a file for best results. Always file in one direction. Check the blade’s sharpness often. Safety is important; wear gloves.
Sharp pruners make gardening easier. Happy pruning!