
How to Open Felco Pruners: A Complete Maintenance Guide
To open Felco pruners, start by unlocking the safety catch at the base of the handles. Once unlocked, press the handles together slightly and locate the central pivot bolt. Use an adjustable wrench to hold the nut steady while unscrewing the bolt with a screwdriver. Carefully separate the blades, keeping track of any washers. Remove the spring by unhooking it from both attachment points. Now your pruners are open for maintenance.
Understanding Your Felco Pruners
When it comes to gardening tools, Felco pruners are the cream of the crop. Whether you’re a professional landscaper or a weekend gardening enthusiast, knowing how to properly open and maintain your Felco pruners is crucial for their longevity and performance. Let’s dive into everything you need to know about these premium pruning tools.
Different Felco Pruner Models
Before we jump into the opening process, it’s worth noting that Felco offers various models, from the classic Felco 2 to the ergonomic Felco 8. While the basic opening procedure remains similar across models, there might be slight variations in the mechanism. I’ve worked with dozens of different models, and I can tell you that understanding your specific model will make the maintenance process much smoother.
Basic Components of Felco Pruners
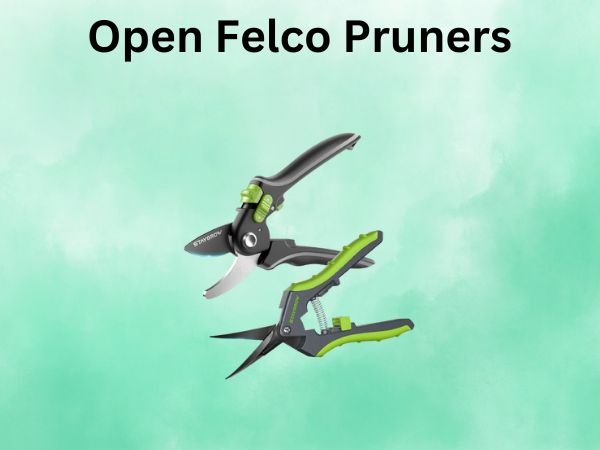
Your Felco pruners consist of several key parts: the cutting blade, anvil blade, spring mechanism, locking mechanism, and handle grips. Think of these components as a well-orchestrated team – each part plays a crucial role in the pruning performance.
Tools Required for Opening Felco Pruners
Essential Tools List
To open your Felco pruners properly, you’ll need:
- A small flathead screwdriver
- An adjustable wrench
- A clean workspace
- A container for small parts
- Clean rags or paper towels
Optional Tools for Deep Cleaning
For a more thorough maintenance session, consider having:
- Wire brush
- Penetrating oil
- Compressed air
- Fine-grit sandpaper
- Blade sharpening stone
Step-by-Step Guide to Opening Felco Pruners
Safety Precautions
Let’s start with safety – because who wants a trip to the emergency room while maintaining their gardening tools? Always wear protective gloves when handling the blades. Trust me, those blades are sharp even when they’re “dull” enough to need maintenance!
Removing the Safety Lock
First things first – locate the safety lock at the bottom of your pruners. It’s like the seatbelt of your pruners, keeping everything secure when not in use. Push or slide it to the open position. Some models have a button-style lock, while others feature a sliding mechanism.
Disassembling the Main Components
Removing the Spring
Here’s where things get interesting. The spring is like the heart of your pruners – it provides the force needed for smooth operation. To remove it:
- Locate the spring ends where they connect to the handles
- Carefully unhook one end first
- Gently remove the entire spring
- Place it in your parts container
Separating the Blades
This step requires patience and precision. The blades are held together by a central bolt or pivot point. Using your adjustable wrench:
- Hold the nut steady on one side
- Unscrew the bolt from the other side
- Carefully separate the blades
- Keep track of any washers or spacers
Maintenance While Open
Now that you’ve successfully opened your pruners, it’s time for some TLC. This is like giving your car a thorough detailing – the more attention you pay now, the better they’ll perform later.
Cleaning Techniques
Remove built-up sap, dirt, and debris using:
- Warm soapy water for basic cleaning
- Wire brush for stubborn residue
- Compressed air for hard-to-reach spots
- Fine-grit sandpaper for rust spots
Lubrication Points
Proper lubrication is crucial for smooth operation. Apply lubricant to:
- The central pivot point
- Spring attachment points
- Blade surfaces
- Locking mechanism
Reassembly Process
Think of reassembly as solving a puzzle – each piece has its perfect spot. Start with the main bolt and work your way out to the spring. Ensure all parts are properly aligned before tightening anything.
Common Reassembly Mistakes
Watch out for these common pitfalls:
- Over-tightening the central bolt
- Incorrect spring orientation
- Forgotten washers or spacers
- Improper blade alignment
Troubleshooting Common Issues
Sometimes things don’t go as planned. If you encounter issues like:
- Blades not meeting properly
- Excessive resistance when cutting
- Loose feeling in the handles
- Spring not functioning correctly
These usually indicate either a reassembly error or a worn part that needs replacement.
Frequently Asked Questions
How often should I open and clean my Felco pruners?
For regular users, a thorough cleaning and maintenance session every 3-4 months is recommended. However, if you use them professionally, monthly maintenance might be necessary.
Can I replace parts myself when I have my pruners open?
Yes, most Felco pruner parts are replaceable. However, ensure you use genuine Felco replacement parts to maintain the tool’s quality and warranty.
Why do my pruners feel stiff after reassembly?
This usually happens due to over-tightening the central bolt or improper lubrication. Try loosening the bolt slightly and adding more lubricant to the moving parts.
Is it normal for the spring to wear out faster than other parts?
Yes, the spring typically experiences the most stress during use. It’s one of the most commonly replaced parts and is designed to be easily replaceable.
Can I sharpen the blades while the pruners are opened?
Absolutely! Having the pruners open provides better access to the blade surfaces, making it easier to achieve the proper sharpening angle.
Conclusion
Opening and maintaining your Felco pruners doesn’t have to be intimidating. With the right tools and approach, you can keep these premium tools in top condition for years to come. Remember, regular maintenance not only extends the life of your pruners but also ensures safer, more efficient gardening.