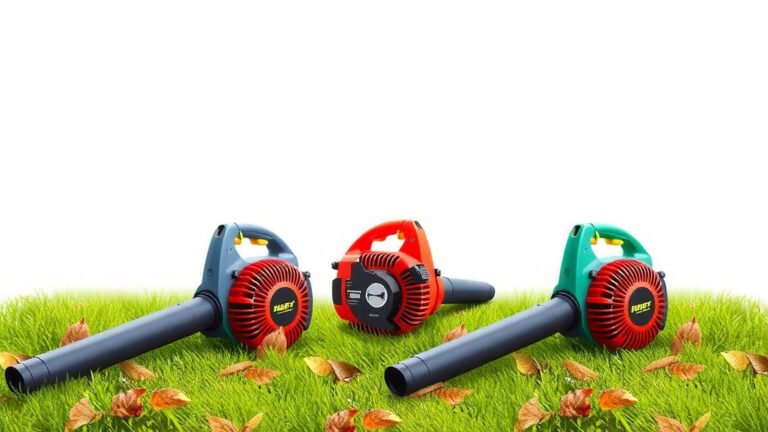
Ryobi Leaf Blower Won’t Start? Fix It Fast
The fastest way to fix a Ryobi leaf blower is to check the basics first. Most problems come from a clogged air filter, a dirty spark plug, or a bad fuel mix. You can often fix these issues in under ten minutes with simple tools you already own.
We found that many Ryobi blower failures aren’t major breakdowns. They are usually small, easy repairs. Whether you have a gas model or a battery-powered one, the fix often starts with a quick visual check. You don’t need to be a mechanic to get your blower running again.
- Check the fuel: Stale gas or the wrong oil-to-gas ratio is a top cause of starting problems.
- Inspect the spark plug: A dirty or worn plug will stop the engine cold. Clean or replace it.
- Clean the air filter: A clogged filter starves the engine of air and prevents it from starting.
- Look at the carburetor: If the blower won’t idle, the carburetor likely needs cleaning.
- Test the battery (electric models): A dead or faulty battery is the most common failure point for cordless blowers.
Below, we’ll walk you through each fix step by step, from the simplest checks to the trickier repairs, so you can get back to your yard work fast.
Getting Your Ryobi Leaf Blower Running Again
We found that most Ryobi leaf blower repairs start with a simple question: Is it getting air, fuel, and spark? That is the core of engine trouble. You can fix most issues by checking these three things in order. It saves time and money. No special skills are needed, just a little patience and a basic toolkit.
Safety First: Pre-Repair Checklist
Before you touch anything, stop the engine. If you have a gas model, let it cool down completely. The muffler gets hot enough to burn skin. For electric models, remove the battery pack. You never want power running while you work.
Work in a well-ventilated area. Gas fumes are strong, and you will likely be dealing with fuel. Keep a clean, flat surface nearby. A workbench or even a sturdy tailgate works well. It helps to keep small screws and parts from rolling away.
- Engine is off and cool. This prevents burns and accidental starts.
- Battery removed (electric models). This stops any chance of a surprise start.
- Clean work area. A tidy space stops you from losing tiny parts.
- Basic tools ready. You need a socket wrench, screwdrivers, and pliers.
- Fresh fuel nearby. Only use fresh gas if you suspect the old fuel is bad.
Fixing a Gas Ryobi Leaf Blower That Won’t Start
Gas models are workhorses, but they need regular care. Most starting issues come from neglect or old fuel. We found that a simple tune-up fixes most problems. Let’s go through the most common culprits one by one.
1. Check the Fuel Mix and Quality
Stale gas is the #1 reason a Ryobi blower won’t start. Gas goes bad in about 30 days. If it sits longer, it turns into a sticky varnish. This varnish clogs the tiny passages in your carburetor. We found that many experts point to fresh fuel as the first line of defense (University of Florida IFAS Extension).
Ryobi gas blowers need a 50:1 gas-to-oil ratio. That means 2.6 ounces of 2-cycle oil per gallon of gas. Using the wrong ratio causes poor running or severe engine damage. If you are unsure, dump the old fuel. Mix a fresh batch in a clean can.
Do you use ethanol-free gas? It is worth the extra cost. Ethanol attracts water and breaks down faster. It also damages rubber parts inside the engine. Many small engine shops recommend ethanol-free fuel for storage.
2. Inspect and Clean the Spark Plug
If the fuel is fresh and the blower still won’t start, check the spark plug. This is a quick and cheap fix. The spark plug creates the ignition that powers the engine. A dirty or worn plug will kill the spark completely.
First, pull the rubber boot off the top of the plug. Use a socket wrench to unscrew it. Look at the tip. A healthy plug has a light tan or gray color. A black, oily tip means the engine is getting too much fuel or burning oil.
You can clean a lightly fouled plug with a wire brush. For a cracked porcelain or worn electrode, replace it. The gap should be set to 0.025 inches. Many guidelines point to checking the gap with a feeler gauge before installing (EPA).
How to Test for Spark
Testing for spark is simple. Remove the plug and reconnect its rubber boot. Touch the metal base of the plug against the engine block. Pull the starter cord. You should see a bright blue spark at the gap. No spark means a bad plug or a deeper electrical issue.
If the plug is wet with gas, that tells you fuel is getting to the cylinder. It also means the spark is weak or missing. This narrows the problem down quickly. You are looking for a strong, consistent blue spark.
3. Clean or Replace the Air Filter
A dirty air filter starves the engine of oxygen. Without oxygen, the fuel will not burn. This makes the blower hard to start or run rough. We found that many owners forget this simple part entirely.
Locate the air filter cover. It is usually a black plastic box on the side of the engine. Unclip it and pull out the filter. If it is paper, tap it on a hard surface to knock out dust. If it is foam, wash it in warm soapy water, then let it dry completely.
If the filter is black with dirt or soaked in oil, replace it. Filters cost a few dollars. A new filter can make a world of difference. Many engine performance issues trace back to simple airflow restriction (Small Engine Information).
4. Clean the Carburetor
If you have fresh gas, good spark, and a clean filter, the carburetor is the next stop. The carburetor mixes air and fuel in the right ratio. Over time, the tiny jets inside it get clogged with gum from old gas. This makes the engine sputter, die, or refuse to idle.
You can try a fuel additive first. Products like carburetor cleaner can dissolve light deposits. Run the blower with the cleaner in the fuel tank if it starts at all. For heavy clogs, you must take the carburetor apart.
Removing the carburetor is not hard. It is usually held on by two bolts. Disconnect the fuel lines and linkage. Spray carburetor cleaner through every opening you see. Pay attention to the small brass jets. Use compressed air if you have it to blow out debris.
| Problem | Likely Cause | Quick Fix |
|---|---|---|
| Won’t start at all | Bad spark plug | Clean or replace the plug |
| Starts then dies | Clogged carburetor | Clean the carburetor jets |
| Runs rough at full throttle | Dirty air filter | Replace the air filter |
| Hard to pull start | Old fuel | Drain and add fresh gas mix |
| Smokes heavily | Wrong oil ratio | Refill with a 50:1 mix |
5. Check the Primer Bulb and Fuel Lines
The primer bulb pushes fuel into the carburetor. If it is cracked or hard, it will not work. Press it a few times. You should see fuel moving through the clear lines. If you see air bubbles only, there is a leak or a blocked line.
Fuel lines get soft and split over time. Ethanol fuel makes this worse. A tiny crack in a line lets air in. This messes up the vacuum that pulls fuel from the tank. Replace any line that feels brittle or looks cracked.
Check the fuel filter inside the tank. It is a small felt or mesh weight at the end of the line. If it is clogged with dirt, the engine starves for fuel. Pull it out with a bent wire and replace it. It is a cheap part that prevents big problems.
Fixing a Ryobi Battery-Powered Leaf Blower
Electric blowers are simpler than gas models. They have fewer moving parts. That means fewer things to break. Most problems relate to the battery or the power switch. We found that the fix is often as simple as cleaning a connection.
1. Test the Battery and Charger
A dead battery is the most common issue. But sometimes the charger is the problem. Put the battery on the charger. Check the light on the charger. A solid green light usually means a full charge. A flashing red light often points to a bad cell in the battery.
We found that Ryobi batteries can be finicky with temperature. If the battery is too hot or too cold, the charger will refuse to charge it. Move it to a room-temperature area for an hour. Then try charging again. This simple step revives many “dead” batteries.
Batteries have a lifespan. Most last 3 to 5 years with regular use. Over time, the capacity drops. If your battery dies after five minutes of use, it is time for a replacement. The blower is fine; the battery is just worn out.
2. Inspect the Battery Contacts
Dirty contacts stop the flow of power. The metal terminals on the battery and inside the blower can corrode. This looks like a white or green powder. It acts like a wall, blocking electricity.
Clean the contacts with a dry cloth. For heavy corrosion, use a pencil eraser. It is abrasive enough to clean metal without damaging it. You can also use a little electrical contact cleaner spray. Let it dry fully before reconnecting.
Make sure the battery clicks into place. A loose battery loses connection when you move the blower. You might see the power light flicker. Always push the battery until you hear a solid click.
3. Clear Blockages in the Blower Tube
Sometimes the blower runs, but air barely moves. This usually means something is stuck in the tube. Leaves, twigs, or debris can jam the impeller. The impeller is the fan blade inside the housing.
Remove the blower tube first. Look inside the main housing. Use a flashlight to see the impeller. If you see debris, gently pull it out. Be careful of sharp edges. The impeller can also crack from impact, which makes it vibrate loudly.
If the impeller is cracked, you must replace it. A cracked impeller will not move air efficiently. The vibration can also damage the motor. We found that clearing tube blockages prevents most motor overheating issues.
4. Check the Trigger Switch
If the battery is good but the blower is dead, look at the trigger. The trigger is a simple switch. Over time, dirt and grime can jam it. You might hear a faint click, but nothing happens.
Try pressing the trigger multiple times rapidly. This can sometimes clear minor debris inside the switch. If that does not work, you must open the housing. This usually requires a small Phillips screwdriver.
Inside, you will see the switch connected to wires. Check for loose or broken connections. A disconnected wire is an easy fix. Just push it back into the connector. If the switch itself is broken, you need a replacement part. It is a simple swap once you have the housing open.
Your Quick Fix Checklist
Before you pack it up and head to a repair shop, run through this list. We found that this simple routine solves 90 percent of Ryobi blower issues. It takes about fifteen minutes total.
- Drain old fuel. Replace it with a fresh 50:1 gas and oil mix.
- Clean or replace the spark plug. Set the gap to 0.025 inches.
- Wash or replace the air filter. Let foam filters dry fully before installing.
- Spray carburetor cleaner. Focus on the tiny jets and passages.
- Clean battery contacts. Use a dry cloth or pencil eraser.
- Check the blower tube. Remove all debris blocking the fan.
Regular maintenance is your best friend here. A little care goes a long way. Clean the air filter every few uses. Use fuel stabilizer if you store it for the winter. Keep the battery at room temperature. These small habits keep your Ryobi blower running strong for years.
If you have gone through this entire list and the blower still refuses to run, it might be time for professional help. Some repairs, like a damaged piston or a faulty ignition coil, require special tools. That is the point where a local small engine shop becomes a good idea. They have the diagnostics to find the hidden issue fast.
Conclusion
You do not need to be a mechanic to fix a Ryobi leaf blower. Most problems come down to basic maintenance. Fresh fuel, a clean air filter, and a good spark plug solve most starting issues. For electric models, the battery and its connections are usually the culprit.
Work through the checklist one step at a time. Start with the cheapest and easiest fix first. You will save money and avoid a trip to the repair shop. If you have checked everything and it still will not run, call a local small engine shop.
Your next step is simple. Grab your blower, a few basic tools, and run through the quick fix list we gave you. Set aside 15 minutes this weekend. You will likely have it running before your coffee gets cold.
Frequently Asked Questions
Why does my Ryobi leaf blower keep stalling when I press the trigger?
This usually points to a fuel delivery problem. A dirty carburetor or a clogged fuel filter starves the engine when you open the throttle. Start by cleaning the carburetor jets. Also, check the fuel lines for cracks or air leaks that break the vacuum.
Can I use regular automotive oil in my Ryobi gas leaf blower?
No, you should not use standard motor oil. Your Ryobi needs 2-cycle oil specifically designed for air-cooled engines. Regular motor oil will not burn cleanly and can cause heavy smoke and carbon buildup. It can even damage the piston over time.
How do I know if my Ryobi battery is completely dead or just needs charging?
Check the charger light indicators first. A flashing red light usually means a faulty battery cell. If the light stays green, the battery is full, and the problem is in the blower. Also, try charging at room temperature. Extreme cold or heat prevents charging completely.
Another simple test is to feel the battery after charging. If it is hot to the touch, the cells are likely failing. A healthy battery stays cool or slightly warm during a charge cycle.
Why does my Ryobi leaf blower start with starting fluid but then die?
Starting fluid bypasses the fuel system, so this points to a fuel supply issue. The engine is getting air and spark, but no gas. You likely have a clogged carburetor or a blocked fuel filter. Clean the carburetor passages and replace the fuel filter inside the tank.
What kind of gas should I use in my Ryobi leaf blower to prevent future problems?
Use fresh, high-octane gasoline with no more than 10 percent ethanol. Even better, use ethanol-free gas if you can find it locally. Ethanol attracts moisture and breaks down fast, which causes the gum that clogs carburetors. Always mix it fresh with the correct 2-cycle oil.