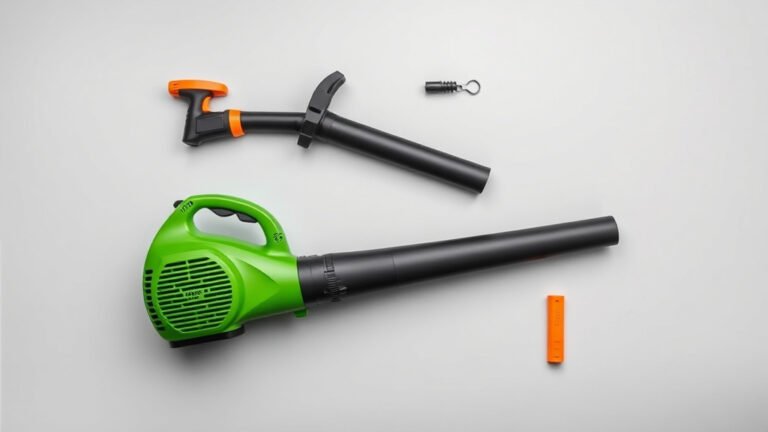
Gas Leaf Blower Maintenance Guide for Nov 2026
To keep your gas leaf blower running strong, the most important thing is to clean or replace the air filter and spark plug at the start of every season. This simple step prevents most starting problems and power loss. You should also use fresh fuel and a fuel stabilizer to keep the carburetor clean.
Regular maintenance does not have to be complicated or take a lot of your time. We found that a basic tune-up takes less than 30 minutes with just a few simple hand tools. Taking care of your blower now helps you avoid expensive repairs later and keeps it starting on the first pull.
- Fuel first: Use fresh, ethanol-free gas and mix it with a fuel stabilizer.
- Air filter: Check it monthly and clean or replace it as needed.
- Spark plug: Inspect the gap and replace it once a year.
- Storage: Run the carburetor dry before storing the blower for winter.
- General care: Keep the cooling fins and exterior free of dirt and debris.
Below, we break down the complete step-by-step process to keep your leaf blower in top shape all year long. Let’s walk through the exact routine we recommend for a reliable, easy-starting machine.
Keeping Your Gas Leaf Blower in Prime Condition
The secret to a reliable gas leaf blower is a simple, repeatable maintenance routine. You do not need to be a small engine mechanic to keep it running. We found that most homeowners can handle every step in this guide with basic tools from their garage.
Think of your blower like a lawn mower, but smaller and more sensitive. It needs clean air, fresh fuel, and a strong spark to fire up on the first pull. The steps below cover the entire machine, from the fuel tank to the air intake.
Why Regular Maintenance Matters More Than You Think
Small engines fail for predictable reasons. The biggest culprit is dirty fuel sitting in the carburetor for months. The second biggest issue is a clogged air filter that chokes the engine of oxygen.
Many experts say that a simple tune-up can extend the life of your equipment by several years. The Environmental Protection Agency (EPA) notes that properly maintained small engines run cleaner and burn less fuel. That means you save money and reduce emissions at the same time.
Skipping maintenance is like ignoring the oil light in your car. It works for a while, but eventually, the repair bill gets steep. A spark plug costs a few dollars. A carburetor replacement costs fifty times that.
Your Step-by-Step Gas Blower Maintenance Plan
We recommend following this order every time. It moves from the most common problem areas to the least common. This sequence keeps your hands cleaner and prevents you from re-doing work.
Step 1: Use Fresh Fuel and the Right Oil Mix
Gas goes bad. It starts to break down in as little as 30 days. Old gas leaves a sticky varnish inside your carburetor that blocks tiny fuel jets.
Always buy fuel within the last month. If you can find ethanol-free gas at a local station, use it. Ethanol attracts water and is hard on rubber seals. Many small engine repair shops recommend ethanol-free fuel as the single best way to prevent carburetor problems.
For two-cycle engines, you must mix oil with the gas. Check your blower’s manual for the exact ratio, usually 40:1 or 50:1. Mixing it wrong can destroy the engine. Use a dedicated mixing container and mark it clearly so you never grab the wrong one.
Adding Fuel Stabilizer the Right Way
A fuel stabilizer is a cheap insurance policy. Add it to your gas can before you fill it up. That way, the stabilizer mixes evenly with the fuel as it goes into the tank.
Stabilizers keep the fuel fresh for up to 12 months. We found that using a stabilizer every single fill-up is better than only adding it before winter storage. It keeps the entire fuel system cleaner all year long.
Here is a quick reference for fuel health:
| Fuel Age | Condition | Action |
|---|---|---|
| Under 2 weeks | Good to use | No action needed |
| 2 to 4 weeks | Acceptable with stabilizer | Use soon |
| Over 1 month | Risky | Drain and replace |
| Over 3 months | Likely bad | Dispose of properly |
Do not pour old gas on the ground. Take it to a local hazardous waste drop-off site. It is the responsible way to handle it.
Step 2: Clean or Replace the Air Filter
Your blower sucks in a lot of air, and that air carries dust and dirt. The air filter catches all of that junk. When the filter gets clogged, the engine starves for oxygen and runs rich. You will notice a loss of power and a rough idle.
Check the filter every month during the season. If it is a foam filter, wash it in warm soapy water and let it air dry. Squeeze a little oil into it before reinstalling. If it is paper, tap it gently to remove loose dirt. If the paper looks dark or damaged, replace it.
We found that a dirty air filter is the reason most blowers run rough after sitting for a year. It is a two-minute fix that solves a frustrating problem.
Step 3: Inspect and Replace the Spark Plug
The spark plug provides the ignition that starts combustion. Over time, the electrode wears down and the gap widens. This makes the engine harder to start and reduces efficiency.
Pull the spark plug wire off and use a socket wrench to remove the plug. Look at the tip. A light tan color is perfect. Black and sooty means the engine runs too rich. White and blistered means it runs too hot.
Check the gap with a feeler gauge. The correct gap is listed in your manual, usually around 0.025 inches. If the gap is off, gently tap the electrode to adjust it. If the plug is worn or corroded, replace it with a new one. It costs about five dollars and takes three minutes to install.
Step 4: Check the Fuel Lines and Primer Bulb
Fuel lines get brittle over time. Cracks in the line let air in, which causes the blower to surge or die under load. Look at the lines where they connect to the carburetor and the fuel tank.
Squeeze the primer bulb a few times. It should fill with fuel and feel firm. If it feels spongy or does not draw fuel, the bulb or the pickup line might be clogged. Many experts say that replacing fuel lines every two to three years is good preventive maintenance.
This is a great time to check for leaks. Wipe the area around the carburetor with a clean rag. If you see fresh fuel or oily residue, you have a leak that needs attention.
Cleaning the Exterior and Cooling System
Your blower needs airflow to stay cool. The cooling fins on the cylinder and the flywheel fan pull air over the engine. When they get clogged with grass and debris, the engine overheats.
Overheating is a silent killer. It can warp the cylinder head and cause a costly seizure. We found that a simple visual check prevents most overheating issues.
Use a soft brush or compressed air to remove debris from the cooling fins. Do not use a metal tool that could scratch the fins. A clean engine runs cooler and lasts longer. It also looks better when you pull it out of the garage.
Keeping the Air Intake Screen Clear
Most blowers have a screen near the flywheel to prevent debris from entering. This screen gets clogged easily, especially when you are blowing wet leaves. A clogged screen restricts airflow and causes the engine to overheat quickly.
Take a few seconds to check the screen every time you refuel. Clear away any leaves or twigs you see. This simple habit takes ten seconds and can prevent major engine damage.
Seasonal Storage: Preparing for Winter and Summer Breaks
How you store your blower is just as important as how you use it. Most carburetor damage happens during long periods of inactivity. The fuel left in the carburetor evaporates and leaves behind sticky residue.
We recommend running the blower dry before storing it for more than 30 days. This means letting it idle until it runs out of gas and dies on its own. This process burns the fuel out of the carburetor bowl and leaves the system clean.
Do not try to force it to run by squeezing the primer bulb. Just let it die naturally. After it stops, pull the starter cord a few times to expel any remaining vapor from the cylinder.
The Fuel Drain Checklist for Long-Term Storage
If you have to store the blower for more than a few months, use this simple checklist. It takes about ten minutes and saves you from a frustrating spring startup.
- Drain the fuel tank into an approved gas can.
- Run the engine dry to clear the carburetor.
- Remove the spark plug and add a teaspoon of oil into the cylinder.
- Pull the starter cord slowly to coat the cylinder walls.
- Reinstall the spark plug without connecting the wire.
- Clean the exterior and store it in a dry, covered area.
This extra step with the oil in the cylinder prevents rust from forming on the piston rings. Many repair technicians report that this simple trick is the reason some engines last twice as long as others.
Troubleshooting Common Starting Problems
Even with perfect maintenance, things go wrong. When your blower refuses to start, do not panic. Work through a logical sequence instead of randomly pulling the cord.
First, check the basics. Is there fuel in the tank? Is the on/off switch in the on position? Is the choke set correctly for a cold start? We found that the majority of “broken” blowers are simply out of fuel or left in the off position.
When to Seek Professional Repair Help
If you have fresh fuel, a clean filter, and a new spark plug, and it still will not start, it is time to see a professional. Carburetor rebuilds and cylinder repairs require special tools and training.
Do not keep pulling the starter cord hoping it will magically fix itself. You will only flood the engine and make the problem worse. Take it to a certified small engine shop and let them diagnose the issue.
We found that most repair shops offer a flat-rate diagnostic fee. It is worth the money to get a professional opinion rather than buying random parts and guessing.
Your blower is a workhorse. With a little care, it will start on the first pull for years to come. That means more time getting the job done and less time fighting with stubborn equipment. Stick to this routine, and you will be the neighbor with the cleanest yard and the most reliable tools on the block.
Conclusion
Keeping your gas leaf blower in top shape really comes down to a few simple habits. You need fresh fuel, a clean air filter, and a good spark plug. That is the core of it. We found that taking 30 minutes at the start of the season prevents almost all major problems.
Do not overthink the process. Stick to the routine we laid out above, and your blower will start on the first pull every time. You will save money on repairs and avoid the frustration of a dead machine in the middle of fall cleanup.
Here is your next step: Grab a new spark plug and air filter today. Check your owner’s manual for the part numbers, order them online, and set aside time this weekend for a quick tune-up. Your future self will thank you when the leaves start falling.
Frequently Asked Questions
How often should I change the spark plug on my gas leaf blower?
We recommend replacing the spark plug once a year or every 100 hours of use. If you use your blower heavily, check it mid-season. A worn plug makes starting harder and hurts fuel efficiency.
Can I use regular car oil in my two-cycle leaf blower?
No. You need special two-cycle oil designed for air-cooled small engines. Regular motor oil will not burn correctly and can leave heavy carbon deposits. It can also cause the engine to overheat and seize up.
Why does my gas leaf blower stall when it gets hot?
This is usually a sign of a vapor lock or a dirty carburetor. Fresh fuel with a stabilizer helps. Also, check that the cooling fins are clean. If the engine overheats, it will stall to protect itself.
Is it bad to leave gas in my leaf blower over the winter?
Yes, it is bad. Gas breaks down and turns into varnish that clogs the carburetor. You should always run the blower dry before storing it for more than 30 days. This simple step prevents the most common spring-starting issue.
What is the best way to clean a foam air filter?
Wash it in warm soapy water and squeeze it dry. Do not twist or wring it, as that can tear the foam. Once it is dry, add a few drops of air filter oil and squeeze it through evenly. Then it is ready to reinstall.