
Can You Use a Leaf Blower to Clean a Dryer Vent
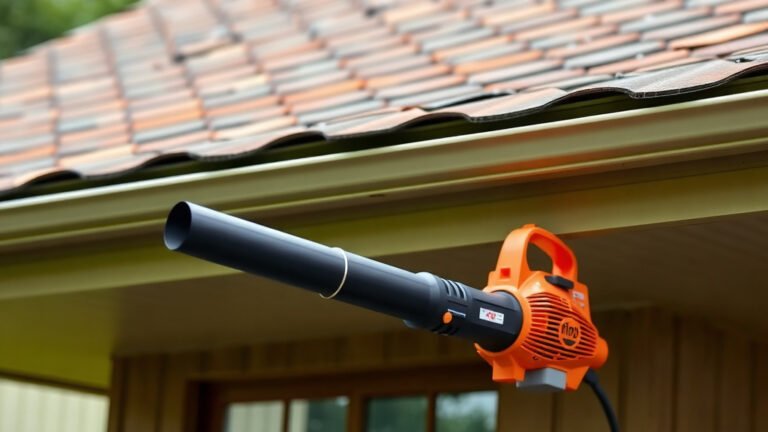
Yes, you can use a leaf blower to clean your dryer vent, but you need to do it safely and correctly. The key is to use the leaf blower to push air through the vent from the inside out. This helps dislodge stubborn lint buildup that a vacuum alone often misses.
Cleaning your dryer vent is vital for preventing house fires and keeping your dryer running efficiently. A clogged vent makes your dryer work harder, which wastes energy and can take multiple cycles to dry clothes. We found that a leaf blower is a powerful and budget-friendly alternative to expensive professional cleaning kits.
- The best method: Disconnect the vent hose from the dryer, place the leaf blower nozzle at the opening, and seal it with tape.
- Do this outside: Blow from inside your house out through the exterior vent flap to avoid blowing lint back inside.
- Watch for lint clouds: If you see a burst of lint outside, it is working. Keep blowing until no more debris exits.
- Safety first: Always unplug the dryer before you start and make sure the vent flap opens freely outside.
- Not a replacement: Use a vacuum or specialized brush kit for deep cleaning if your vent is very long or has sharp bends.
Below, we walk you through exactly how to use a leaf blower on your dryer vent step by step, including what to avoid and how to know when you are done. Let’s get your dryer working like new again.
Why a Leaf Blower Works Surprisingly Well for Vent Cleaning
Most people think dryer vents only need a quick vacuum now and then. That is simply not enough. Lint builds up inside the duct over months and hardens into a matted layer. A vacuum hose can grab the loose stuff on the surface, but it struggles with the compacted gunk stuck to the walls.
We found that a leaf blower solves this problem with raw power. It pushes a massive volume of air through the duct. That air pressure acts like a strong hand shoving the lint out from the inside. You get a deep clean without spending money on expensive rotating brush kits.
This method is especially helpful for vents that run straight from the dryer to an exterior wall. The shorter and straighter the duct, the better the leaf blower works. Many experts say this technique is a solid middle ground between a basic vacuum and a full professional cleaning (Consumer Reports).
How Air Pressure Beats Vacuum Suction for Lint
Think about a drinking straw. Sucking on it pulls liquid up. But if you blow through it, you can push a pea across the table. That is the basic difference here.
Vacuum suction has a hard time pulling lint that is wedged into crevices or stuck to the metal. Air pressure from a leaf blower pushes the entire column of air forward. Every bit of debris in that path gets shoved out. This makes it far more effective for stubborn clogs.
Many guidelines point to this push method as a fast way to clear heavy buildup (U.S. Fire Administration). You are not just skimming the surface. You are forcing the blockage to move.
Gathering the Right Tools Before You Start
Before you climb behind your dryer, take a quick inventory. You do not need a fancy kit. We found that a few common household items are all you really need.
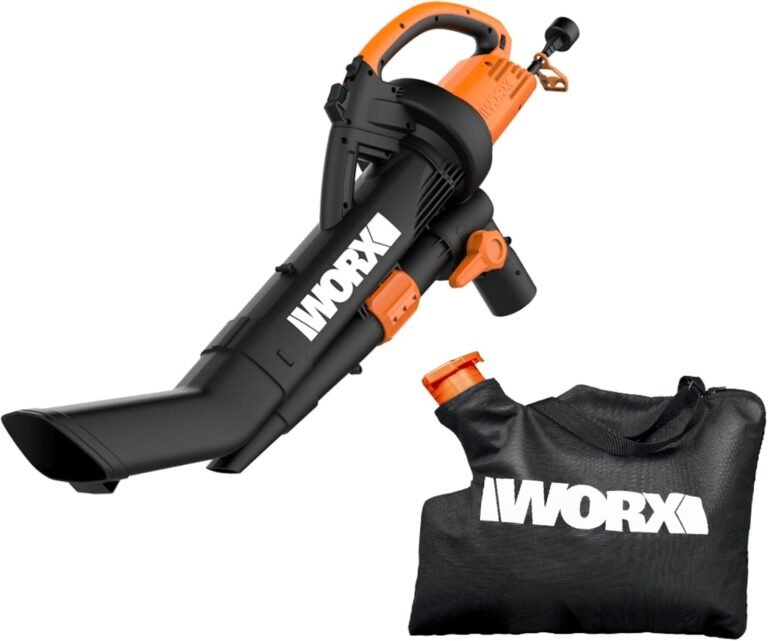
- A leaf blower (gas or electric, either works)
- Duct tape or masking tape (for sealing the connection)
- A screwdriver (to loosen hose clamps)
- A shop vacuum (for cleaning up loose lint around the dryer)
- A flashlight (to inspect the vent opening)
- Work gloves (to protect your hands from sharp metal edges)
You might also want a second person to help. One person handles the leaf blower. The other watches the outside vent flap to confirm lint is exiting. It makes the job much easier and safer.
Choosing Between Gas and Electric Leaf Blowers
Both types get the job done. However, we found that gas blowers produce more raw air volume. That extra power helps with long vent runs or severe clogs.
Electric blowers are lighter and easier to manage in tight laundry rooms. They are also quieter and have no fumes. If your vent run is under 15 feet, an electric blower is plenty strong.
Here is a quick comparison to help you decide:
| Feature | Gas Leaf Blower | Electric Leaf Blower |
|---|---|---|
| Air power | Higher volume | Moderate, usually enough |
| Weight | Heavier | Lighter |
| Noise level | Very loud | Loud, but less harsh |
| Best for | Long vents, heavy clogs | Short vents, quick jobs |
Either option works fine for the average home. Use what you already have. There is no reason to buy new equipment.
Step-by-Step Guide to Blowing Out Your Dryer Vent
Now let us walk through the actual process. It takes about 20 minutes from start to finish. We found that following these steps in order prevents mistakes and keeps lint from ending up all over your house.
Step 1: Unplug the Dryer and Clear the Area
Safety comes first. Unplug the dryer from the wall outlet. Never skip this. You are working near electrical components and metal ducting.
Pull the dryer away from the wall. You need enough room to reach the back panel. Move any boxes, laundry baskets, or other items out of the way. You want a clear path to work.
Step 2: Disconnect the Vent Hose from the Dryer
Find the clamp that holds the vent hose to the dryer’s exhaust port. Loosen it with a screwdriver or by hand if it has a spring clamp. Slide the hose off the port carefully.
Do not pull the hose too hard. It may be attached to the wall on the other end. You only need to separate it from the dryer, not remove the whole system.
Step 3: Position the Leaf Blower at the Dryer Port
Place the nozzle of the leaf blower right up against the dryer’s exhaust opening. This is the metal port on the back of the dryer where the hose was attached. The nozzle should fit snugly inside or press firmly against it.
Use duct tape to seal the gap between the nozzle and the port. This creates an airtight seal. Without a good seal, you lose air pressure and the cleaning power drops significantly.
Step 4: Send a Helper Outside to Watch the Vent Flap
This step is easy to overlook but very important. Have someone stand outside near the dryer vent exhaust. They will watch for the burst of lint that comes out when you start blowing.
If you do not have a helper, you can check the vent flap yourself before and after. But a helper makes it much easier to know when the vent is clear.
Step 5: Blow Through the Vent Until It Runs Clear
Turn on the leaf blower and let it run. You should see a cloud of lint shoot out from the exterior vent. This is a good sign. It means the air is moving the debris.
Keep the blower running for 30 to 60 seconds. Then turn it off and let the vent rest. Turn it back on for another burst. Repeat this cycle a few times. This pulsing action helps dislodge stubborn lint clumps.
Step 6: Reconnect the Hose and Test the Dryer
Once the outside vent shows no more lint coming out, you are done. Slide the vent hose back onto the dryer port. Tighten the clamp securely. Plug the dryer back in.
Run an empty cycle on high heat for 10 minutes. Go outside and check the vent flap. It should open fully and release warm, moist air. If the flap barely opens or the air feels weak, there is still a blockage.
Common Mistakes to Avoid When Using a Leaf Blower
We found that most problems come from a few simple errors. Avoiding these mistakes keeps your vent cleaning safe and effective.
Blowing from the Outside In Is a Big Mistake
Some people try to blow from the exterior vent into the house. This is wrong. It pushes all the lint and debris back inside your home. You end up with a dusty mess in the laundry room.
Always blow from the inside out. The air should push lint out through the exterior flap. This directs the mess outside where it belongs.
Forgetting to Remove the Lint Trap Screen
The lint trap inside the dryer is not part of the vent system. You do not need to remove it for this method. But you should clean it thoroughly before you start. A clean lint trap improves airflow and makes the leaf blower more effective.
Using Too Much Tape and Leaving Residue
Duct tape works great for sealing, but it leaves sticky residue. Use just enough to create a seal. When you are done, peel it off carefully. You can use a small amount of rubbing alcohol to clean off any sticky leftover.
How to Know When Your Vent Is Truly Clean
You do not want to guess whether the vent is clear. We found that a few simple checks confirm a successful cleaning job.
- Check the outside flap. It should swing open freely without sticking.
- Feel the airflow. Place your hand near the exterior vent. You should feel a strong, steady breeze.
- Look for lint on the ground. If lint is still blowing out, keep going.
- Time a dryer cycle. Clothes should dry in one cycle, not two or three.
- Check the laundry room. It should not feel unusually hot or humid during drying.
- Inspect the vent hose. It should feel cool to the touch, not hot, after a cycle.
If all these checks pass, your vent is clean and working efficiently. Your dryer will run faster and use less energy.

When a Leaf Blower Is Not Enough
A leaf blower works wonders on straight, short vents. But some setups need more than air pressure. If you have a long vent run, sharp turns, or a flexible foil hose, you may need a different approach.
Signs You Need a Professional Vent Cleaning
There are a few red flags that mean you should call a professional. Do not ignore these signs. They could point to a serious blockage or a damaged vent.
- The vent run is longer than 25 feet.
- The vent has multiple 90-degree bends.
- You hear a whistling sound when the dryer runs.
- You smell burning or see lint near the dryer.
- The dryer takes more than two cycles to dry a normal load.
Many fire safety guidelines recommend a professional cleaning every 1 to 2 years (National Fire Protection Association). A pro uses specialized rotary brushes and powerful vacuums. They can also inspect for damage or bird nests.
Using a Flexible Hose vs. Rigid Metal Duct
Rigid metal ducts are the best for cleaning. They are smooth inside, so lint does not stick as much. A leaf blower can easily push air through them.
Flexible foil or plastic hoses are trickier. Their ridged surface catches lint. The bends and sagging sections trap debris. A leaf blower might not clear these completely. In this case, you may need to disconnect the hose and clean it manually or replace it.
How Often You Should Clean Your Dryer Vent
Regular cleaning prevents the buildup that leads to fires. We found that a simple schedule keeps your dryer safe and efficient.
Most households should clean their dryer vent at least once a year. If you have a large family and do many loads, aim for every six months. If you notice any of the warning signs we mentioned, clean it right away.
Many guidelines point to yearly inspections as a minimum standard (U.S. Consumer Product Safety Commission). Set a reminder on your phone. It takes less than an hour and can save you from a costly repair or a dangerous fire.
Final Checklist for Your Leaf Blower Vent Cleaning
Use this quick checklist to make sure you covered everything. Print it or save it on your phone.
- Unplug the dryer and pull it away from the wall.
- Disconnect the vent hose from the dryer port.
- Seal the leaf blower nozzle to the port with tape.
- Have a helper watch the outside vent flap.
- Blow in short bursts until no more lint exits.
- Reconnect the hose, plug in the dryer, and test a cycle.
That is it. You just saved yourself a service call fee. Your dryer will thank you with faster drying times and lower energy bills.
Conclusion
You just learned a smart, budget-friendly way to tackle one of the most important maintenance tasks in your home. Using a leaf blower to clean your dryer vent pushes out the hidden lint that causes slow drying and fire risks. You do not need expensive tools or a professional for most setups.
We found this method works best on short, straight vents. Remember to always blow from the inside out, seal the connection well, and watch for that burst of lint outside. Safety comes first, so unplug the dryer and use a helper when you can.
Here is your next step: block out 20 minutes this weekend and give your dryer vent a quick cleaning. Your clothes will dry faster, your energy bills will drop, and you will have real peace of mind knowing your home is safer.
Frequently Asked Questions
Can I use a leaf blower on a dryer vent that has bird nests or heavy debris?
Yes, but use caution. A leaf blower can push out loose debris like leaves or small twigs. However, a compacted bird nest may need to be removed by hand first.
We found that trying to blow out a large nest can pack it tighter into the duct. If you see signs of nesting, pull the vent hose off and inspect it manually before using the blower.
Will using a leaf blower damage my dryer or the vent duct?
No, not when you use it correctly. The air pressure is not strong enough to damage rigid metal ducts or the dryer itself.
However, you should avoid pointing the blower at the dryer’s internal components. You are only attaching it to the exhaust port on the back, so there is no risk. Just make sure your duct is securely connected before you start.
How is a leaf blower different from using a compressed air hose?
Both use air pressure to push lint out. The main difference is volume. A leaf blower moves a massive amount of air at moderate pressure, which is ideal for long vent runs.
A compressed air hose has higher pressure but much lower volume. You might get a strong blast, but it cannot sustain the airflow needed to push through an entire vent. We found the leaf blower is the better tool for this job.
Is it safe to use a gas leaf blower inside my laundry room?
It is safe but not ideal. Gas blowers produce exhaust fumes that can be unpleasant in a closed space. You need to open a window or door for ventilation while working.
We recommend an electric blower for indoor use. It has no fumes and is much lighter to handle in tight spaces. If you only have a gas blower, use it briefly and keep the area well-ventilated.
Should I clean the outside vent cover and flap while I am at it?
Yes, you absolutely should. While your helper is outside watching for lint, have them check the flap for debris or blockages. A stuck flap will undo all your hard work.
Wipe down the louvers and remove any grass, leaves, or cobwebs. Make sure the flap swings open easily. This simple extra step ensures your vent stays clear longer and works more efficiently.