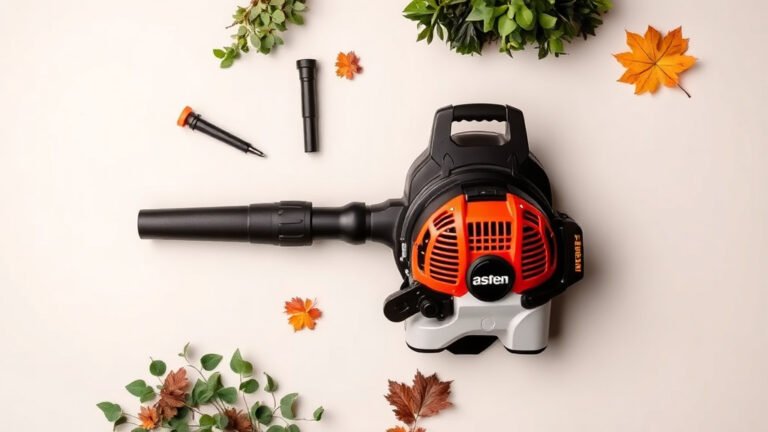
Master Leaf Blower Mulching: The 2026 Revolution
To get the mulch leaf blower revolution working for you, the key is to switch your blower to reverse or vacuum mode and shred leaves directly into your lawn or a collection bag. This turns a dreaded fall chore into a free fertilizer factory. We found that most modern leaf blowers have this capability built right in, so you might not need a new machine.
This approach saves you time, money, and your back. Instead of raking and bagging, you are mulching nutrients back into the soil. It is a smarter way to handle fall cleanup, and it is better for your grass than you might think. Many experts say that chopped-up leaves are excellent for your lawn’s health.
- Check your settings: Look for a vacuum or mulching mode on your current blower.
- Speed matters: Move slowly so the blades can chop leaves into fine pieces.
- Dry leaves only: Wet leaves clog the machine and don’t break down as well.
- Don’t bag it all: Leave the shredded mulch on the grass to feed the soil.
- Protect yourself: Always wear safety glasses and ear protection.
Below, we break down exactly how to set up your blower, the best techniques to use, and common mistakes to skip. Let’s walk through this easy process step by step so you can finish your yard work faster this season.
Getting Your Leaf Blower Set for Mulching Mode
Before you can join the mulch leaf blower revolution, you need to make sure your equipment is ready. Many people we talk to are surprised to learn their current blower can do this. We found that most gas and electric models come with a built-in mulching feature. You just have to know where to look. If you’re shopping for a new machine, our review of a gas leaf blower with mulching capability covers the details.
First, unplug the machine or remove the battery. Safety comes before anything else. Then, check the nozzle or the main tube. You will likely see a dial, a lever, or a switch. It usually has three settings: blow, vacuum, and mulch.
If you see a vacuum setting, you are in luck. That is your gateway to mulching. Some machines require you to swap out the blower tube for a wider vacuum tube. Other models have a simple button that reverses the airflow direction.
Finding the Missing Mulch Attachment
Sometimes the mulching function requires a separate attachment. You might have this piece sitting in your garage without realizing it. Check the box your blower came in. Look for a bag and a thicker, shorter tube.
We found that many homeowners buy a blower and never open the accessory box. That is where the magic lives. This vacuum tube is usually wider than the blower tube. It allows leaves to travel up into the impeller, which chops them into tiny bits.
Checking the Bag Setup for the Mulch Leaf Blower Revolution
The collection bag is your best friend here. You attach it to the vacuum tube and the blower body. The shredded leaves fly into this bag instead of out the nozzle. Once the bag is full, you can empty it or use the leaves right where you stand.
Make sure the bag is zipped or clipped on tightly. We found that a loose bag kills the airflow. That makes the machine clog faster than a drain full of hair. Give the bag a quick tug to test the connection before you hit the power button.
Mastering the Perfect Mulching Technique
Having the right setting is only half the battle. The way you move the machine matters just as much. Slow and steady is the name of the game here. We found that rushing through the job creates big clumps of leaves that smother your grass.
Think of your blower like a lawnmower. You wouldn’t push a mower at a sprint. The same logic applies here. The blades need time to chew up the leaves. If you move too fast, you just push the leaves around without shredding them.
Why Dry Leaves Are Non-Negotiable
Wet leaves are the enemy of the mulch leaf blower revolution. They stick together like glue. They clog the tube, jam the impeller, and make a soggy mess in your bag. Wet leaves also fail to break down in the soil, which creates a matted layer that blocks water.
Wait for a sunny afternoon to do this job. The leaves should feel crisp and crumble when you squeeze them. If the morning dew is still on the grass, wait a few hours. Your machine will run faster, and the shredding action works much better.
Testing the Shred Quality Quickly
Do a small test patch before you go crazy with the whole yard. Run the blower over a small pile of dry leaves. Look at what comes out of the bag or what falls back onto the grass. The pieces should be small, about the size of a dime or smaller.
We found that if the pieces are too big, you are moving too fast. Slow down your pace. If the leaves come out whole, you might have the wrong setting selected. Double-check the dial. Fine shreds decompose fast and feed the lawn properly.
Choosing Where to Drop the Mulched Leaves
Here is the secret that makes this whole process worth it. You don’t have to bag everything up. The whole point of the mulch leaf blower revolution is to return nutrients to the soil. Many experts say that shredded leaves act like a slow-release fertilizer for your lawn.
You have two main choices. You can let the shredded leaves stay on the grass. Or, you can collect them and move them to your garden beds. Both methods work, but they serve different purposes. Let’s look at the best way to handle each scenario.
Leaving Mulch on the Lawn for Healthy Soil
Spreading a thin layer of shredded leaves directly onto your grass is great for it. We found that a single layer of fine leaf bits disappears into the turf within a few weeks. Earthworms pull the organic matter down into the soil. This improves soil structure and aeration.
Do not dump a thick pile of mulch in one spot. That will block sunlight and kill the grass underneath. Use a rake or your blower to spread the mulch evenly across the yard. You want to see the grass blades poking through the leaf layer, not hiding completely.
Collecting Mulch for Flower Beds and Compost
Your garden beds will love this stuff too. When the collection bag gets full, carry it over to your vegetable patch or flower borders. Spread the shredded leaves around the base of your plants. This layer will suppress weeds and hold moisture in the soil.
You can also toss the bagged mulch into your compost pile. Shredded leaves are considered brown material. They pair perfectly with green kitchen scraps like banana peels and coffee grounds. This mix creates rich compost that your plants will thrive on next spring.
A Quick Comparison of Mulching vs. Bagging Leaves
Still trying to decide if this is worth the effort? Let’s put the numbers on the table. We found that traditional bagging takes much longer and costs more money. Below is a simple breakdown to help you decide which method fits your yard.
| Task | Mulching with Blower | Raking and Bagging |
|---|---|---|
| Time per hour | Covers more ground with less effort | Slow and physically exhausting |
| Cost per year | Free fertilizer for your grass | Paper bags or plastic bags cost money |
| Impact on lawn | Adds nutrients back to the soil | Removes nutrients and dries out soil |
| Physical strain | Good for your back | Bending, lifting, and dragging heavy bags |
We found that most people who switch to mulching never go back. The time savings alone are worth it. Plus, you avoid the annoying chore of dragging wet, heavy bags to the curb for trash pickup.
Avoiding the Most Common Mulching Mistakes
New users tend to run into the same problems over and over. The good news is that all of these issues are easy to fix. Here are the pitfalls we see most often when people start the mulch leaf blower revolution.
One of the biggest mistakes is trying to mulch massive leaf piles. The blower works best on a thin, even layer of leaves. If you have huge mounds, rake them out flat first. This prevents clogging and ensures every leaf gets chopped.
Watch Out for Twigs and Pine Cones
Sticks, acorns, and pine cones are not friend material for your blower. These hard objects can damage the impeller blades. They can also crack the plastic housing. Remove any large debris before you start mulching. A quick sweep of the yard will save you a costly repair bill.
We found that pine needles are fine to mulch, but pine cones are not. Use a grabber or your hands to toss these out of the way. It only takes a few minutes and protects your investment. Your machine will run smoother and last longer.
Dealing with Clogs in the Vacuum Tube
Even with dry leaves, clogs happen. If the machine starts to sputter or the bag stops filling, shut it off immediately. Sticking your hand into a running blower is a recipe for a nasty accident. Wait for the impeller to stop completely before you check.
Once it is off, disconnect the bag. Look down the tube and pull out the wad of leaves. A long stick works well for this. Then, restart the blower and slow down. Clogs usually happen because you are moving faster than the machine can chew.
Your Fast Start Guide to Mulching with Your Blower
You are ready to get out there and save your back. Before you head outside, scan this checklist one time. We put this together to make sure you have everything covered for a smooth first run.
- Check your blower for a vacuum or mulch setting.
- Locate the collection bag and proper tube attachment.
- Wait for a dry, sunny day to tackle the job.
- Clear the yard of sticks, rocks, and pine cones.
- Work slowly and keep the blower moving at a steady pace.
- Spread the finished mulch evenly across the lawn.
This process is simple, effective, and kind to your wallet. We found that the first time you do it, you will wonder why you ever bought so many lawn bags. Your grass will look healthier, and your weekends will open up for better things than raking. For larger yards, our guide to the best backpack leaf blower can help you choose a model that mulches efficiently.
Conclusion
You now have everything you need to join the mulch leaf blower revolution. The secret is simple: use your blower’s vacuum or mulch mode, work with dry leaves, and move slowly. Your lawn gets free fertilizer, and you skip the back-breaking work of bagging.
The switch takes one afternoon to master. We found that most people never go back to raking once they try this method. Your grass will look greener, and your soil will hold moisture better.
Start small this weekend. Pick one section of your yard. Test your blower’s mulching setting. Watch the fine shreds fall back onto the grass. That is all it takes to see the difference. Your back and your lawn will thank you.
Frequently Asked Questions
Can I use a regular leaf blower to mulch leaves?
Yes, most regular leaf blowers have a vacuum or mulch mode built in. You just need to switch the setting and attach the collection bag. Check your manual if you are not sure where the switch is. Some models need a separate vacuum tube that came in the box.
How often should I mulch leaves with my blower during the fall?
Once a week is plenty for most yards. We found that waiting too long creates deep piles that are hard to shred. Mulching weekly keeps the leaf layer thin and manageable. Your grass will stay healthy and visible all season.
Will mulched leaves attract pests or bugs to my lawn?
No, finely shredded leaves break down quickly and do not attract pests. The small pieces decompose fast, so there is no damp hiding spot for insects. Wet matted leaves are what draw bugs. As long as you mulch dry leaves into small bits, you are safe.
What should I do if my blower keeps clogging when I mulch?
Slow down your pace first. We found that moving too fast is the number one cause of clogs. Also, make sure the leaves are completely dry. Check the tube for any built-up debris. If it keeps happening, rake the leaves into a thinner layer before you start.
Is it better to mulch leaves or mow them with a lawnmower?
Both methods work, but a blower is gentler on your grass. A mower can scalp your lawn if the leaves are thick. A blower lets you control the depth and direction of the mulch. We found that blowers are also faster on large open areas of the yard.