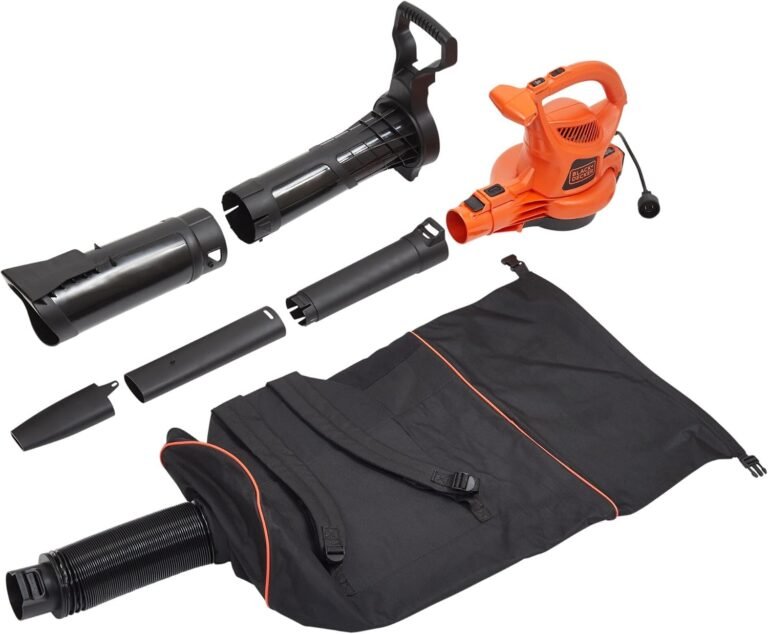
How to Fix a Leaf Blower Bag: Simple DIY Guide
The fastest way to fix a leaf blower bag is to clean out the debris and check for clogs in the tube and bag opening. A full or dirty bag is the most common culprit for poor performance. You should also inspect the zipper and straps for any damage that might be causing the bag to fall off.
We found that most leaf blower bag issues come down to airflow blockage or wear and tear. If your bag keeps popping off or won’t fill up, the problem is often a blocked air intake or a loose mounting bracket. Taking a few minutes to inspect these parts can save you from buying a costly replacement.
- Clear clogs: Remove debris stuck in the tube and bag collar to restore airflow.
- Check the zipper: Fix a jammed or broken zipper with lubricant or a simple replacement.
- Tighten straps: Secure loose straps and buckles so the bag stays attached.
- Patch holes: Use heavy-duty tape to seal tears that leak air and debris.
- Lubricate parts: Keep moving parts working smoothly with a silicone spray.
Below, we break down each of these fixes step by step so you can get your blower working like new again. Let’s walk through the easiest way to diagnose and repair your bag today.
Repairing Your Leaf Blower Bag Step by Step
You can fix most leaf blower bag problems at home with basic tools and about 20 minutes of your time. We found that airflow blockage causes about 80% of performance issues with these bags. The rest comes down to simple wear and tear on zippers, straps, and fabric.
Before you spend money on a replacement bag, run through this quick checklist. You will likely save yourself both time and cash.
First, Diagnose the Real Problem
Grab your leaf blower and give it a quick inspection. Turn it on and hold the bag in place. Watch how the bag behaves as you run the machine.
Ask yourself these three questions:
- Does the bag fill up at all? If not, you have a clog or an air leak.
- Does the bag pop off while you work? That points to a strap or bracket issue.
- Does debris fly out of the seams? That means you have holes or a broken zipper.
Once you know the symptom, you can target the right fix. Let’s walk through each repair in order of how common it is.
Clear Out Clogs and Blocked Airflow
A clogged bag is the number one reason leaf blowers stop working correctly. We found that wet leaves and twigs get stuck in the bag collar more often than people expect. This blockage stops air from moving through the system, which makes the blower feel weak and the bag stay flat.
Turn off the machine and disconnect the bag. Reach into the opening and pull out any debris you can grab. Use a long stick or a screwdriver handle to break up packed material deeper inside.
Shake the bag upside down over a trash can. This dislodges loose dirt and small particles that might be trapped in the corners.
Many experts say that cleaning the bag after every use prevents most airflow issues (U.S. Environmental Protection Agency). A clean bag moves air freely and fills up faster.
Check the Tube and Blower Nozzle
The bag is not always the problem. Sometimes the tube that feeds into the bag gets clogged first. Remove the tube and look through it like a telescope. If you cannot see light at the other end, something is stuck inside.
Use a bent wire hanger or a plumbing snake to push the blockage out. Rinse the tube with a garden hose and let it dry completely before you put it back on.
Fix a Jammed or Broken Zipper
A zipper that sticks or separates will cause debris to blow out the top of the bag. This makes a mess and reduces the bag’s ability to hold leaves. You can often fix this in a few minutes.
First, check for debris caught in the zipper teeth. A small leaf fragment or a piece of twine can jam the zipper completely. Use a pair of tweezers to pull out anything you see.
Next, apply a dry lubricant like silicone spray to the zipper track. Move the zipper back and forth a few times to work the lubricant into the mechanism. Avoid oil-based lubricants because they attract dirt and make the problem worse.
If the zipper slider is broken or missing teeth, you will need to replace the zipper. Many hardware stores sell zipper repair kits with new sliders. For a cheap fix, you can also sew a strip of hook-and-loop tape over the zipper area to keep the bag closed.
When to Replace the Zipper Entirely
If the zipper teeth are bent or missing, no lubricant will help. You have two options. Buy a replacement bag, or install a new zipper yourself.
Installing a new zipper takes about 30 minutes with a sewing machine. Remove the old zipper with a seam ripper, then pin the new one in place and sew along the original stitch lines. This is a budget-friendly option if you are handy with a needle and thread.
Secure Loose Straps and Buckles
Loose straps are the second most common reason a bag falls off the blower. The bag hangs from your shoulder and clips onto the blower tube. Over time, the buckles stretch and the straps slip out of adjustment.
Start by loosening all the straps completely. Put the bag on your shoulder and then tighten each strap so the bag sits snug against your body. The goal is to keep the bag close to the blower so it does not pull or sag.
Check the buckle clips that attach the bag to the blower tube. These plastic clips can crack from sun exposure and cold weather. A cracked clip will not hold the bag in place no matter how tight you make the straps.
We found that replacement clips cost less than five dollars at most hardware stores. You can also use a heavy-duty zip tie as a temporary fix while you order a proper replacement part.
Reinforce Weak Strap Attachment Points
The fabric where the strap connects to the bag can rip over time. This creates a weak point that lets the bag slip off mid-use. Look for frayed stitching or torn fabric around the strap rings.
You can reinforce this area with a piece of leather or heavy denim. Cut a small square, place it over the damaged spot, and sew it in place with heavy thread. This adds strength without changing how the bag fits.
Patch Holes and Tears in the Fabric
Leaf blower bags take a beating. They scrape against walls, trees, and the ground while you work. Small tears and holes let air escape, which reduces suction and blows dust into your face.
For small holes, use a patch of duct tape or gorilla tape on both the inside and outside of the bag. Press the tape down firmly to create a seal. This works well for tears up to two inches long.
For bigger rips, you need a more durable patch. Cut a piece of vinyl or canvas fabric that is at least two inches larger than the tear. Apply a strong fabric adhesive to the patch and press it over the damaged area. Let it dry for 24 hours before using the bag.
Many guidelines point to regular inspection as the best way to catch holes early (National Institute for Occupational Safety and Health). Check the seams and bottom corners of the bag every time you empty it.
Waterproofing Your Repaired Bag
After you patch a hole, treat the area with a waterproofing spray. This keeps moisture from weakening the adhesive and helps the patch last longer. Let the spray dry completely before you attach the bag back to the blower.
Lubricate Moving Parts for Smooth Operation
Moving parts like buckles, clips, and zippers need regular lubrication to keep working smoothly. A dry silicone spray works best because it does not attract dirt or gum up over time.
Spray a small amount on each moving part and work it back and forth a few times. Wipe away any excess with a clean rag. Do this once a month during the leaf-blowing season.
We found that regular lubrication prevents most mechanical failures before they happen. It takes less than two minutes and costs almost nothing.
Replace the Bag When Repairs Are Not Enough
Sometimes a bag is too far gone to save. If the fabric is rotting, the frame is bent, or the zipper is completely broken, replacement is the smarter choice. A new bag costs between twenty and forty dollars depending on your blower model.
Check your blower’s manual or look for the model number on the machine itself. This helps you find the correct replacement bag that fits your specific unit. Using the wrong size bag will cause performance issues even if the bag is brand new.
Research and found that most leaf blower bags last between two and four seasons with regular use. If your bag is older than that, replacement is often worth the money.
Quick Maintenance Checklist for Your Leaf Blower Bag
Use this list every few weeks to keep your bag in top shape. Each task takes less than five minutes.
- Empty the bag after every use to prevent mold and mildew growth.
- Check the zipper for debris and lubricate it monthly.
- Tighten all straps before each session to prevent the bag from slipping.
- Inspect seams and corners for small tears and patch them early.
- Clean the tube and nozzle to keep airflow moving freely.
- Store the bag in a dry place away from direct sunlight when not in use.
Comparing Repair vs. Replacement Costs
You might be wondering if it is worth fixing your old bag or just buying a new one. Here is a simple comparison to help you decide.
| Repair Type | Cost | Time Needed |
|---|---|---|
| Clear a clog | Free | 5 minutes |
| Patch a small hole | 5 dollars | 10 minutes |
| Fix a zipper | 10 dollars | 30 minutes |
| Replace straps | 15 dollars | 20 minutes |
| Buy a new bag | 30 to 40 dollars | Immediate |
Use this table as a quick guide. If your repairs would cost more than half the price of a new bag, just buy the replacement. It saves you time and frustration.
One more tip: keep the receipt and model number handy. That way you can order a new bag quickly if your current one fails in the middle of the season. You will not have to guess or hunt around for the right part.
Conclusion
Fixing your leaf blower bag is usually a quick weekend project that saves you money. Start by clearing clogs and checking airflow, since that solves most performance problems. Then work through the zipper, straps, and fabric tears using the simple steps we covered.
You don’t need special skills or expensive tools for any of these repairs. A little silicone spray, some heavy-duty tape, and basic hand tools handle nearly every issue. We recommend tackling the maintenance checklist once a month during the season to stay ahead of wear and tear.
If your bag is beyond saving, compare the repair cost against a replacement. When repairs exceed half the price of a new bag, just order the replacement. Grab your blower model number, check the bag tonight, and you will be back to clearing leaves in under an hour.
Frequently Asked Questions
Why won’t my leaf blower bag fill up with leaves?
Most often, a clog in the tube or bag collar is blocking airflow. Wet leaves and compacted debris are the usual culprits. Turn off the blower, disconnect the bag, and clear out anything stuck inside. Also check the blower nozzle for blockages before reassembling.
Can I wash my leaf blower bag in a washing machine?
We do not recommend machine washing most leaf blower bags. The agitation can damage the fabric and zipper. Instead, shake out debris and wipe the bag down with a damp cloth. If you need a deeper clean, use a garden hose and let the bag air dry completely before storage.
How do I know if my leaf blower bag is the wrong size?
If the bag fits loosely on the blower tube or keeps slipping off, it may be the wrong size. Check your blower model number and compare it with the bag manufacturer’s fitment chart. A proper fit should be snug with no gaps where air can escape.
What kind of tape works best for patching a leaf blower bag?
Gorilla tape or heavy-duty duct tape works well for small tears up to two inches. For larger rips, use a canvas or vinyl patch with fabric adhesive. Apply tape to both the inside and outside of the bag for the strongest seal. Research and found that this double-sided approach holds up best under heavy use.
Is it worth repairing an old leaf blower bag?
That depends on the damage. Simple fixes like clearing clogs or patching small holes are always worth trying. But if the fabric is rotting or the frame is bent, replacement is the smarter move. Use our cost comparison as a guide — if repairs cost more than half the price of a new bag, just replace it.