Leaf Blower to Vacuum: Easy Conversion Guide
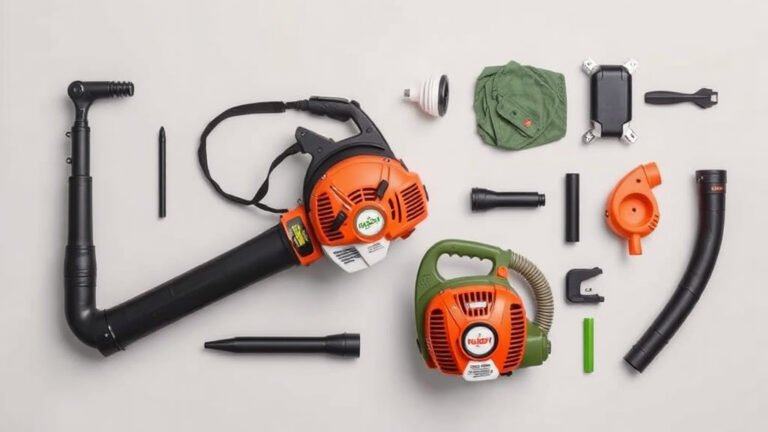
To convert a leaf blower to a vacuum, you simply swap the blower tube for the vacuum tube and attach the collection bag. Most gas and electric leaf blowers come with these parts already included in the box. If yours didn’t, you can buy a conversion kit that fits your specific model.
Converting your blower into a vacuum is a smart move that saves you money and storage space. You get two powerful yard tools in one machine. This setup lets you suck up leaves and small debris instead of just blowing them around. Most homeowners can finish the switch in under five minutes with zero tools required. It’s one of the easiest DIY yard hacks you will do this season.
- Check your manual: First, see if your leaf blower already includes vacuum attachments.
- Remove the blower tube: Twist and pull the main blowing nozzle off the motor housing.
- Attach the vacuum tube: Click or screw the wider vacuum nozzle securely into place.
- Connect the collection bag: Fasten the bag to the exhaust port to catch all the debris.
- Switch the settings: Flip the mode switch to “vacuum” if your unit has one before starting.
Below, we walk you through every step of the swapping process, including safety tips and what to do if your machine jams. Let’s get your yard cleaned up in no time.
Swapping Your Leaf Blower into a Vacuum Setup
You probably own a leaf blower that doubles as a vacuum already. We found that most popular gas and electric models include the conversion parts in the original box. You just need to know where to look and how to attach them correctly.
The key is understanding the airflow direction. A blower pushes air out the front. A vacuum pulls air in the front and pushes it out the back into a bag. When you swap the tubes, you are reversing the machine’s job. It takes just a few minutes once you see how the pieces lock together.
Confirming Your Machine Has Vacuum Capability
Not every leaf blower can become a vacuum. We found that some cheap electric models are blow-only units. Check the side of the motor housing for a dial or switch labeled “blower” and “vacuum.” If you see that switch, you are good to go.
Look inside the box for the original accessories. You need a wide vacuum tube and a canvas collection bag. These parts are usually wrapped in plastic. If you bought the blower used, you might be missing these pieces. In that case, search for a vacuum kit made for your specific brand and model number.
Buying a Conversion Kit for Missing Parts
Many hardware stores sell universal conversion kits. You can also order them online from the manufacturer. We found that OEM parts fit the best, but universal kits often work fine. Just measure the diameter of your blower’s nozzle before you buy. The kit needs to match that size to create a tight seal.
If your machine lacks a vacuum switch, do not force it. A blow-only motor cannot handle the suction load. You could burn out the motor or melt the housing. Save your money and buy a dedicated leaf vacuum instead.
Step-by-Step: Turning Your Blower into a Suction Machine
Now comes the hands-on part. We found that the process is nearly identical across brands like Toro, Black+Decker, and Craftsman. Always disconnect the power source first. Unplug electric units and remove the spark plug wire on gas models. This keeps you safe from accidental startups.
Here is the core sequence you need to follow:
- Remove the long blower tube by twisting it counterclockwise.
- Inspect the locking tabs for any dirt or debris.
- Align the vacuum tube with the notches on the motor housing.
- Push the tube in firmly and twist it clockwise until it clicks.
- Slide the collection bag onto the exhaust port on the back.
- Zip or buckle the bag’s shoulder strap onto the frame.
Attaching the Vacuum Tube the Right Way
The vacuum tube is wider than the blower tube. This wider opening increases the suction area. You want to feel a solid click when it locks. If it wobbles, the suction will leak and leave debris behind.
Many units have a small screw that secures the tube. We found that using this screw prevents the tube from vibrating loose. Tighten it by hand until snug. Do not over-tighten. You might strip the plastic threads.
Hooking Up the Collection Bag Correctly
The collection bag catches everything you suck up. Attach the metal ring at the bag’s mouth to the exhaust port. Make sure the zipper on the bag is fully closed. A gap here means you will blow dust and leaves right back into your face.
Some bags have a shoulder strap for balance. Use it. The bag gets heavy fast when full. A strap redistributes the weight so you do not strain your back. We found that holding the bag with your free hand helps control the machine on uneven ground.
Selecting the Right Settings Before You Start
Your machine has a mode switch for a reason. Flip it to the “vacuum” setting before pulling the trigger. If you leave it in blower mode, the vacuum tube will just push air outward. You will blow leaves everywhere instead of collecting them.
Some electric models have variable speed triggers. Set the speed to low or medium for dry leaves. Use higher speed only for wet, matted debris. Running at full throttle on light leaves just wastes battery or gas. It also makes the bag fill up with air instead of material.
Choosing Between Mulching and Straight Suction
Most conversion kits include a metal impeller inside the vacuum tube. This impeller shreds the leaves as they pass through. The shredded material takes up less space in the bag. You can fit about 10 times more mulched leaves than whole ones. That means fewer trips to the compost pile.
If you prefer whole leaves for compost, remove the impeller. Check your manual for how to detach it. We found that running without the impeller reduces clogging but fills the bag quickly. Match the setup to your yard’s needs.
Safety Tips for Using a Leaf Blower Vacuum
Safety matters more than speed. You are spinning a metal blade at high velocity inside the tube. The impeller can shred more than just leaves. Keep the vacuum intake away from rocks, acorns, and sticks. These objects can crack the impeller or shoot out of the bag with force.
Wear safety glasses and a dust mask. The vacuum kicks up a lot of fine particulate matter. Many guidelines from the American Lung Association point to reducing exposure to yard dust. A simple mask keeps your lungs happy. Ear protection also helps because these machines run loud.
Handling Electric Cords and Batteries Safely
Corded models need a GFCI outlet for outdoor use. Keep the cord draped over your shoulder and behind your body. This prevents you from accidentally vacuuming the cord. We found that sucking up a power cord is a common DIY mishap. It can trip the breaker and ruin the machine.
Battery-powered units work best with a fully charged pack. Cold batteries drain fast. Store your battery indoors before a fall cleanup session. Keep a spare battery charged so you can swap out mid-task.
Dealing with Clogs and Jams in Your Vacuum
Clogs happen to everyone. You will hear the motor pitch change and the suction drop. Turn off the machine immediately. Unplug it or remove the battery. Never stick your hand into the tube while the unit is connected to power.
Check the intake opening first. Wet leaves and twigs often jam right at the mouth. Pull the debris out gently. Then inspect the bag’s neck area. The passage between the tube and the bag is a common clog spot.
Clearing Stubborn Blockages Safely
For deep clogs, use a long stick or a broom handle. Push it through the tube from the intake side. Do not use metal tools that could scratch the impeller. We found that a gentle twisting motion clears most blockages.
If the clog is near the impeller, open the access panel if your model has one. Many units have a small door for cleaning. If you cannot clear it, let the debris dry out. Wet material compresses into a hard plug. Once dry, it usually breaks apart with a light tap.
Maintaining Your Converted Leaf Vacuum
Regular maintenance keeps your vacuum running strong. After each use, empty the bag completely. Storing wet leaves in the bag leads to mold and a terrible smell. Turn the bag inside out and shake out the dust. Wash it with soapy water a few times a season.
Check the impeller for nicks and wear. A dull or chipped impeller reduces mulching power. Replace it if you see deep cracks. Many hardware stores stock replacement impellers for popular models.
Keeping the Air Vents and Filters Clean
The intake vents on the motor housing pull in cooling air. If they clog with dust, the motor overheats. Use a soft brush to clear them after every few uses. Some electric models have a washable foam filter inside. Rinse it and let it dry fully before reinstalling.
Comparing Blower-Only vs. Converted Vacuum Performance
You might wonder if a converted unit works as well as a dedicated vacuum. We found that dedicated leaf vacuums usually have stronger suction. But they cost more and take up storage space. A converted unit offers decent performance for the average suburban yard.
Here is a quick comparison table to help you decide:
| Feature | Converted Blower | Dedicated Leaf Vacuum |
|---|---|---|
| Cost | Free (parts included) | $100 – $300 |
| Suction Power | Moderate | High |
| Storage Space | One machine | Separate unit |
| Mulching Ratio | 10:1 typical | 15:1 typical |
| Best For | Small to medium yards | Large, leaf-heavy properties |
Before You Start: Quick Prep Checklist
Take a minute to gather your gear and set yourself up for success. A little prep goes a long way. We found that having everything ready makes the job take half the time.
- Check the weather forecast; dry leaves vacuum much easier.
- Walk your yard and pick up large sticks, rocks, and toys.
- Make sure your bag is empty and zipped shut.
- Charge your battery or check the extension cord’s condition.
- Wear closed-toe shoes, long pants, and safety glasses.
- Have a drop cloth ready to dump the bag onto for compost.
Getting the Most Out of Your Leaf Vacuum
Work in sections to avoid getting overwhelmed. Start at the back of your yard and move forward. This way you do not walk through the debris you already collected. Use a sweeping motion with the intake just above the ground. Keep the tube moving slowly so the suction can grab the leaves.
Empty the bag when it is about two-thirds full. A full bag reduces airflow and strains the motor. You will notice the suction drop before you see the bag bulge. Stop and empty it to keep the machine running efficiently.
Many users find that mulching the leaves with a lawn mower first makes the vacuum work better. This pre-shredding reduces the load on your machine. It also lets the vacuum pick up smaller pieces that fit through the tube easier. Try this method on thick leaf piles for best results.
Conclusion
Converting your leaf blower into a vacuum is one of the smartest yard hacks you can make this season. You save money, avoid buying another bulky machine, and get your cleanup done faster. The swap takes about five minutes once you know how the parts lock together.
You learned how to check for vacuum capability, attach the tube, secure the bag, and pick the right settings. You also know how to clear clogs safely and keep the machine running strong all fall. Remember to always disconnect power before touching the tube or impeller.
Your next step is simple: grab your blower, find the vacuum attachments, and do a quick test run on a small patch of leaves. Once you see how easy it is, you will wonder why you did not convert it sooner.
Frequently Asked Questions
Can I convert any leaf blower into a vacuum?
No, not every leaf blower can become a vacuum. You need a unit with a mode switch labeled “blower” and “vacuum” on the motor housing. Check your manual or look for the switch before buying any conversion parts. Blow-only models lack the internal design to handle suction safely.
Why is my leaf blower vacuum not picking up leaves?
The most common cause is a clog in the tube, the impeller area, or the bag’s neck. Turn off the machine and disconnect power first. Check the intake opening for wet leaves or twigs that block airflow. Also make sure the bag is not full and the zipper is completely closed.
How do I know which vacuum conversion kit to buy?
Measure the diameter of your blower’s nozzle with a tape measure or ruler. Compare that measurement to the kit’s listed specs online or on the package. We found that OEM kits from the manufacturer fit the best, but universal kits work well if the size matches.
Should I mulch my leaves before using the vacuum?
Running a lawn mower over thick leaf piles first makes the vacuum work much better. Pre-shredded leaves pass through the tube easier and reduce the risk of clogging. It also puts less strain on the motor and helps the bag fill more evenly.
Is it safe to vacuum wet leaves with a converted blower?
It is safe, but you should expect more clogging with wet leaves. Wet material sticks together and packs into hard plugs inside the tube. We recommend waiting for dry conditions when possible. If you must vacuum wet leaves, run the machine at higher speed and empty the bag more frequently.