How to Replace a Riding Lawn Mower Blade [Like a Pro]
If you’re the proud owner of a riding lawn mower, you know how invaluable it is for keeping your lawn looking pristine and well-manicured. But just like any other piece of equipment, your riding mower’s blades will eventually become worn, dull, or damaged, and need to be replaced. Replacing a riding lawn mower blade may seem like a daunting task, but with the right tools and a little bit of know-how, it’s actually a relatively straightforward process. In this comprehensive guide, I’ll walk you through the steps to replace your riding lawn mower blade like a true pro, so you can keep your lawn looking its best all season long.
Understanding the Importance of Sharp Blades
Before we dive into the replacement process, it’s important to understand why keeping your riding mower’s blades in tip-top shape is so crucial. Sharp, well-maintained blades do more than just give your lawn a clean, even cut – they also help to improve the overall health of your grass. Dull or damaged blades can tear and rip the grass, rather than making a clean cut, which can leave your lawn looking ragged and uneven. This can also make your grass more susceptible to disease and pest infestations, as the damaged blades create an entry point for harmful organisms.
Additionally, using a riding mower with dull blades requires more effort and power from the engine, which can lead to decreased fuel efficiency and increased wear and tear on your machine. By regularly replacing your riding mower’s blades, you’ll not only maintain the aesthetic appeal of your lawn, but you’ll also extend the life of your mower and reduce the risk of costly repairs down the line.
Preparing to Replace the Blade
Alright, now that you understand the importance of keeping your riding mower’s blades in top shape, let’s dive into the replacement process. Before you get started, there are a few key things you’ll need to do to prepare:
- Gather the necessary tools: You’ll need a set of socket wrenches, a torque wrench, and a replacement blade that’s specifically designed for your riding mower model.
- Ensure the mower is on a level surface: Park your riding mower on a flat, level surface and engage the parking brake to keep it from moving while you work.
- Disconnect the spark plug: This is a crucial safety step to prevent the mower from accidentally starting up while you’re working on it.
- Protect yourself: Wear gloves and eye protection to keep your hands and eyes safe while handling the blade.
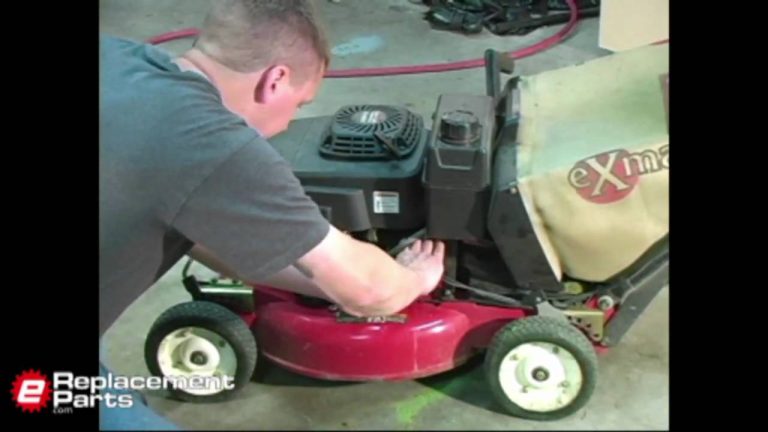
Removing the Old Blade
Now that you’re all set up and ready to go, it’s time to remove the old blade. Here’s how to do it:
- Tilt the mower: Carefully tilt the riding mower onto its side, making sure to keep the air filter and carburetor facing up to prevent any oil or fuel leaks.
- Locate the blade: Identify the blade that needs to be replaced. It’s usually secured to the mower’s deck with a single bolt or nut.
- Loosen the blade: Using your socket wrenches, loosen the bolt or nut that’s holding the blade in place. Be sure to hold the blade steady as you’re doing this to prevent it from spinning.
- Remove the blade: Once the bolt or nut is loose, you can simply lift the old blade off the mower’s deck.
Installing the New Blade
With the old blade removed, it’s time to install the new one. Here’s how to do it:
- Inspect the new blade: Before you install the new blade, take a moment to inspect it for any defects or damage. Make sure it’s the correct size and shape for your riding mower model.
- Position the new blade: Place the new blade on the mower’s deck, aligning it with the mounting point.
- Secure the blade: Using your socket wrenches, tighten the bolt or nut that secures the blade to the deck. Make sure to tighten it to the recommended torque specification, which you can find in your mower’s owner’s manual.
- Double-check the installation: Give the blade a gentle tug to make sure it’s securely in place, and check that it’s able to spin freely.
Balancing the Blade
Once the new blade is installed, it’s important to ensure that it’s properly balanced. An unbalanced blade can cause vibrations and excessive wear on your riding mower’s engine and other components. Here’s how to balance the blade:
- Use a blade balancer: Invest in a simple blade balancing tool, which you can find at most hardware stores or online. This tool will allow you to easily check the balance of your new blade.
- Check the balance: Place the blade on the balancer and see if it tips to one side or the other. If it’s not perfectly balanced, you can gently bend the blade to adjust the weight distribution.
- Recheck the balance: Once you’ve made any necessary adjustments, double-check the blade’s balance to ensure it’s properly centered and ready to go.
Conclusion
Replacing a riding lawn mower blade may seem like a daunting task, but with the right tools and a little bit of know-how, it’s a relatively straightforward process. By following the steps outlined in this guide, you can easily replace your mower’s blades and keep your lawn looking its best all season long. Remember to always prioritize safety, use the correct replacement parts, and regularly maintain your riding mower to ensure it runs smoothly and efficiently for years to come.
FAQs
How often should I replace my riding lawn mower blades?
As a general rule of thumb, it’s recommended to replace your riding mower’s blades every 1-2 years, or whenever they become significantly dull or damaged. However, the exact frequency may vary depending on factors like the size of your lawn, the terrain, and how often you use your mower.
Can I sharpen my riding mower blades instead of replacing them?
Yes, you can often sharpen your riding mower blades to extend their lifespan, rather than replacing them outright. However, it’s important to note that blades can only be sharpened so many times before they become too thin and need to be replaced. If your blades are severely damaged or worn, it’s generally better to replace them rather than trying to sharpen them.
What should I do with my old riding mower blades?
When you replace your riding mower blades, it’s important to dispose of the old ones properly. Most municipalities have specific guidelines for how to recycle or dispose of metal objects like lawn mower blades. Check with your local waste management department to find out the best way to handle your old blades.
How can I tell if my riding mower blades need to be replaced?
There are a few telltale signs that your riding mower blades need to be replaced, including noticeable dullness, visible nicks or cracks in the blade, and an uneven or ragged cut on your lawn. If you notice any of these issues, it’s a good idea to inspect your blades more closely and consider replacing them.
Can I replace the blades on my riding mower myself, or should I hire a professional?
Replacing the blades on a riding lawn mower is generally a relatively straightforward task that most homeowners can easily handle themselves, as long as they have the right tools and follow the proper safety precautions. However, if you’re not comfortable working on your mower or don’t have the necessary equipment, it’s always an option to hire a professional lawn care service or small engine repair shop to handle the blade replacement for you.