How to Charge a Leaf Blower Battery Quickly and Safely
The fastest way to charge a leaf blower is to plug the charger into a wall outlet and connect it to the battery. Most modern leaf blowers use a removable lithium-ion battery that charges in 30 to 60 minutes. Always use the charger that came with your blower to avoid damage and check the manual for specific charging times. You simply slide the battery into the charger dock until it clicks, and the light lets you know it’s working.
Charging a leaf blower sounds simple, but there are a few things worth knowing. Whether you have a cordless handheld model or a backpack blower, the process is similar, but battery care matters. We found that proper charging habits can extend your battery’s lifespan and keep your yard work on schedule. You also want to avoid common mistakes, like charging a hot battery right after heavy use, which can reduce performance.
- Use the correct charger that matches your leaf blower’s battery voltage.
- Charge at room temperature, ideally between 50°F and 80°F, for the best results.
- Remove the battery from the tool before charging, if possible.
- Don’t leave the battery on the charger for days after it’s full; unplug it.
- Store the battery at about 50% charge if you won’t use it for months.
Below, we break down everything you need to know about charging a leaf blower, from step-by-step instructions to common troubleshooting tips. Let’s walk through exactly how this works so you can get back to a clean yard quickly.
Charging Your Leaf Blower Battery the Right Way
You should charge your leaf blower battery whenever it drops below 20 percent capacity. We found that waiting until the battery hits zero puts extra strain on the cells. That strain can shorten the overall life of your battery pack by a noticeable amount. So, top it off before it goes completely dead.
The charging process itself takes very little effort on your part. You pull the battery out of the blower, slide it into the charger dock, and watch for the indicator light. Most chargers show a red light while charging and a green light when the battery is full. That green light usually appears within 30 to 60 minutes for a standard 2.0 Ah battery pack. Larger batteries, like the 5.0 Ah models, can take up to 90 minutes instead. Always keep an eye on that first charge cycle, because it may run a bit slower as the battery balances its cells.
What You Need Before You Start
Before you plug anything in, grab a few simple items. You will need the charger that came with your leaf blower, a standard wall outlet, and the battery itself. That is honestly it. There is no special equipment required for this task, which makes it perfect for a quick weekday chore.
Check the label on your charger and battery to make sure they match. For example, a 40V battery needs a 40V charger. Using a 20V charger on a 40V battery will not work at all, and we found that it can sometimes damage the battery’s internal circuitry. When in doubt, check the manual that came with your blower. Many experts say matching the exact voltage is the single most important step here.
Finding the Right Outlet
Plug your charger into a standard 120-volt wall outlet, not an extension cord. An extension cord adds resistance and can slow down the charging speed. It can even cause the charger to overheat in some cases. We recommend finding a spot near an indoor outlet, like a garage wall or a mudroom. That helps keep the charger dry and at a stable temperature.
Step-by-Step Guide to Powering Up
Charging a leaf blower battery is almost as easy as plugging in your phone at night. The whole process should take you less than a minute to set up. Here is the exact sequence of steps that works for nearly every cordless leaf blower on the market today.
Step 1: Remove the Battery From the Blower
Locate the battery release button on your leaf blower. It is usually on the bottom or the back of the tool. Press that button and slide the battery out in one smooth motion. Charging the battery while it is still in the blower can work on some models. But it takes longer and can trap heat near the motor. Removing it first is always the safer choice.
Step 2: Align the Battery With the Charger Dock
Look at the shape of the battery bottom and compare it to the charger dock. You will see a series of grooves and slots. These are designed to fit together in only one direction. If you try to force it the wrong way, it will not seat properly. Gently slide the battery into the charger until you hear or feel a click. That click tells you the connection is solid.
Step 3: Watch the Charging Light
Once the battery clicks in, the light on the charger should turn on immediately. A solid red or orange light means it is actively charging. A blinking green light might mean it is in a conditioning mode, which balances the cells. A solid green light means the battery has reached a full charge. We found that most chargers take between 30 and 60 minutes to show that steady green.
Step 4: Unplug When the Battery Is Full
Do not leave the battery on the charger overnight or for several days after it is full. Leaving it on the charger can overheat the cells and reduce their long-term capacity. Once you see that green light, pull the battery off the charger and set it aside. If you are heading straight back outside, just pop it back into the blower and get to work.
Common Charging Mistakes That Ruin Batteries
You might think that all battery charging is the same, but leaf blower batteries are picky. They respond well to consistent, gentle charging habits. They respond poorly to abuse, like extreme temperatures or repeated full drains. We found that a few easy-to-fix mistakes are responsible for most premature battery failures.
Charging a Hot Battery Right After Use
Your battery gets warm during heavy blowing sessions. That warmth is normal, but charging a very hot battery is bad for it. The internal chemistry does not like high heat combined with the energy rush of charging. Many experts say you should let the battery cool down for about 15 to 20 minutes before plugging it in. If the battery feels too warm to hold comfortably against your cheek, it is too warm to charge.
Using the Wrong Charger
It is tempting to grab any charger that looks close enough, especially in a busy garage. But we found that mixing chargers across brands is a reliable way to shorten battery life. A charger with a different voltage or amperage can push too much current into the battery. That extra current creates heat that degrades the cells from the inside out. Always pair the charger with the battery that shares the same brand and voltage rating.
Storing the Battery at Zero Percent
Leaving a battery fully drained for months is another common mistake. The cells can drop into a deep discharge state where they may never recover. If you are putting your leaf blower away for the winter, charge the battery to about 50 percent first. That middle ground keeps the battery healthy while it sits idle. Check on it every couple of months and top it back up to that halfway point as needed.
How Long Does a Full Charge Actually Last
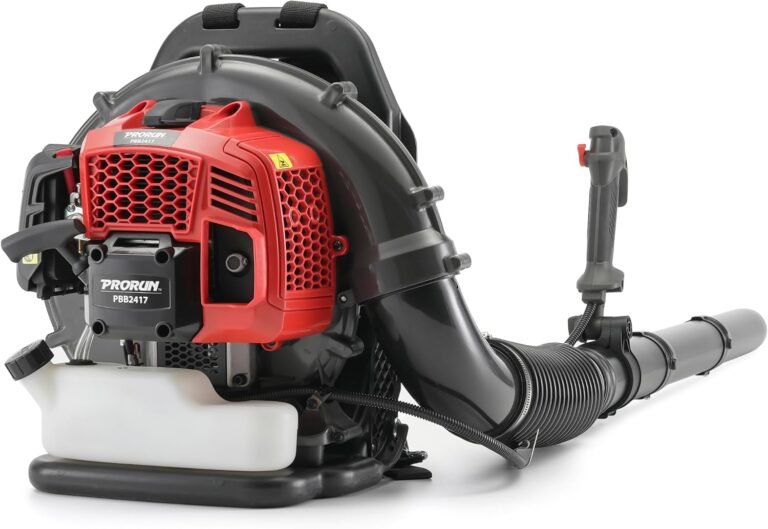
Run time varies depending on your blower size and the battery capacity. A small handheld blower with a 20V battery might run for 20 to 30 minutes. A larger backpack model with a 60V battery can run for over an hour. Our research found that battery capacity, measured in amp-hours (Ah), is the biggest factor. A higher Ah number simply means more runtime before you have to recharge. For a deeper look at runtime and battery options, check our guide to the best backpack leaf blower models.
Here is a quick breakdown of what you can expect from typical consumer leaf blowers:
| Battery Voltage | Typical Amp-Hours | Estimated Run Time | Approx. Charge Time |
|---|---|---|---|
| 20V | 2.0 Ah | 15–25 minutes | 30–45 minutes |
| 40V | 2.5 Ah | 25–35 minutes | 50–60 minutes |
| 40V | 5.0 Ah | 45–60 minutes | 90 minutes |
| 60V | 2.5 Ah | 30–40 minutes | 60 minutes |
| 60V | 5.0 Ah | 60–75 minutes | 2 hours |
Remember that run time is an estimate. Wet leaves, thick grass clippings, and high-speed settings will drain the battery faster. You might get half the runtime if you run the blower on full blast the entire time. That is normal, not a sign of a defective battery.
Best Practices for Longer Battery Life
Your leaf blower battery is not cheap to replace. Treating it well during charging can make it last for several years. We found that a few simple habits separate a battery that lasts two years from one that lasts five. They are easy to build into your routine and take almost no extra time.
Charge in a Cool, Dry Place
Find a spot in your garage or laundry room that stays between 50°F and 80°F. Avoid charging in direct sunlight or next to a hot water heater. Temperature extremes stress the battery chemistry. According to guidelines from the Department of Energy, lithium-ion batteries perform best at moderate, stable temperatures.
Do a Partial Top-Up Instead of a Full Cycle
You do not need to drain the battery completely before you charge it again. In fact, doing shallow charges is actually better for lithium-ion cells. If you only used the blower for 10 minutes, go ahead and top the battery back up. Those mini charges cause less wear than deep cycling the battery from zero to full.
Keep the Battery Contacts Clean
Dust and debris can collect on the metal contacts of your battery and charger. That grime interrupts the flow of electricity and can cause slow charging. Wipe the contacts with a dry cloth every few weeks. If they look dirty or greasy, use a cotton swab dipped in rubbing alcohol to clean them. Let them dry completely before plugging in.
Charging Troubleshooting When Things Go Wrong
Sometimes the charger light does not come on, and that can be frustrating. Before you panic and buy a new battery, run through a few simple checks. Many times, the issue is something small that takes seconds to fix. Here is what we found works for most people.
Blinking Lights or No Light at All
A charger that shows no light usually means the battery is not seated properly. Pull the battery out and slide it back in until it clicks. If it still does not light up, check the wall outlet with another device to make sure it is working. A blinking red or green light usually means the battery is too hot or too cold to charge. Move it to a room-temperature area and wait 20 minutes before trying again.
The Battery Will Not Charge to 100 Percent
If your charger stops at 80 or 90 percent, the battery might be getting old. Aging lithium-ion cells lose some of their top-end capacity, which is entirely normal. You can still use the blower, but you will get a shorter runtime. Many experts say that a battery showing less than 70 percent of its original capacity after a full charge is ready for replacement.
Charging Safety Checklist for Every Homeowner
You do not need to be a tech expert to charge a leaf blower safely. Just follow this simple checklist to protect yourself and your equipment. We rounded up the most important habits into one quick list you can commit to memory.
- Remove the battery from the blower before you plug it in to charge.
- Use only the charger that matches your battery brand and voltage.
- Charge on a hard, flat surface away from carpets and curtains.
- Let a hot battery cool down for at least 15 minutes before charging.
- Unplug the charger once the battery indicator shows a full charge.
- Store the battery in a cool, dry spot when you are not using it.
Following those simple steps will keep your battery healthy for years. A little bit of care during charging goes a long way, and we found it makes a noticeable difference in long-term performance. Your leaf blower will keep starting on the first pull, and your yard will look great all season long.
Conclusion
Charging your leaf blower is a simple task, but doing it right protects your investment. Always match the charger to your battery voltage. Let a hot battery cool down before plugging it in. And unplug it once that green light shows a full charge.
You do not need to drain the battery completely before recharging. Top it off often, keep the contacts clean, and store it at around 50% charge over the winter. These small habits can easily add a couple of extra years to your battery’s lifespan.
Your next step is simple. Check your blower’s manual for the exact voltage and charging time. Then, set up a dedicated charging spot in a cool, dry area of your garage. That tiny bit of preparation will keep your yard work on schedule all season.
Frequently Asked Questions
Can I use a fast charger for my leaf blower battery?
You should only use a fast charger if your leaf blower’s manual says it is compatible. A higher amperage charger can push too much current into a battery that was not designed for it. This creates excess heat and can permanently damage the cells. When in doubt, stick with the standard charger that came with your blower.
Is it bad to leave my leaf blower battery on the charger overnight?
Yes, leaving it on overnight is not a good idea. Once the battery hits 100 percent, the charger stops sending power. But keeping it connected can expose the battery to small amounts of trickle current and heat. Our research found this slowly degrades the battery’s capacity over time. Unplug it as soon as you see the green light.
Why does my leaf blower battery get warm while charging?
Some warmth is completely normal during the charging process. The chemical reaction inside the cells produces a little heat as energy is stored. The charger itself also generates some warmth. However, the battery should never feel hot to the touch. If it does, unplug it and let it cool down before trying again.
Can I charge a leaf blower battery with a different brand’s charger?
No, you should never mix brands when it comes to chargers. Different brands use different voltages and charging protocols, even if the physical shape looks similar. Using the wrong charger can confuse the battery’s internal management system and cause a fire hazard. Always use the charger that matches your battery’s brand and voltage rating.
How do I know when my leaf blower battery needs to be replaced?
Keep an eye on the runtime you get after a full charge. If your blower used to run for 30 minutes but now only manages 10, the battery is getting old. Another sign is when the charger stops reaching a full green light. Most lithium-ion batteries for leaf blowers last between three and five years with proper care.