How to Draw a Leaf Blower: Step-by-Step Guide
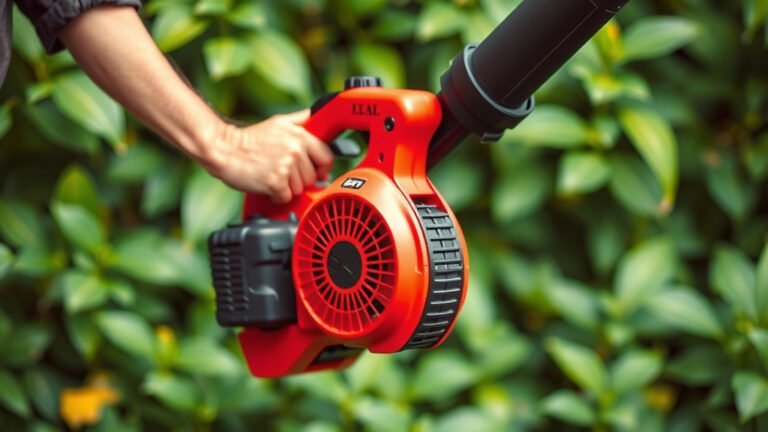
To draw a leaf blower, start with the basic outline of the main tube and the motor housing, then add the handle and nozzle details. You don’t need to be a professional artist to get a recognizable leaf blower sketch on paper. The trick is to break the machine down into a few simple shapes before you add any of the fancy details.
We found that most people struggle with getting the proportions right, specifically the length of the nozzle compared to the body. Whether you want a simple cartoon version or a more realistic drawing, focusing on the basic silhouette and key mechanical parts makes the process much easier. This guide works for hand-drawn sketches, digital art, or even quick doodles.
- Start simple: Draw a long rectangle for the nozzle and a larger circle or square for the motor.
- Add the handle: Sketch a curved line or loop on top of the motor unit.
- Include the details: Add the air intake vents, trigger, and the fan opening at the end.
- Use light lines: Keep your first strokes soft so you can easily erase and adjust the shape.
- Finish with shading: Add darker tones near the bottom and the handle to create depth.
Below, we break down everything you need to know about drawing this yard tool, step by step, so you can create a design that looks balanced and accurate. Let’s walk through the process together and get those lines on the page.
Drawing a Leaf Blower Step by Step
You don’t need a stack of fancy art supplies to get started. A standard pencil, an eraser, and a piece of printer paper work just fine. We found that breaking the machine into simple blocks makes the whole process feel way less intimidating. You are basically drawing a few rectangles and circles that happen to look like a yard tool.
Start by looking at the overall shape. A leaf blower is mostly a long tube attached to a bulky motor. That is your anchor. Once you see those two parts, everything else falls into place. This method works whether you want a quick cartoon or a more detailed sketch.
Gathering Your Drawing Materials
Before you put pencil to paper, grab a few basics. You will need a pencil with a good eraser. A softer pencil, like a 2B, is great for shading later. A ruler helps keep your straight lines clean, especially for the nozzle. If you are working digitally, a simple brush tool and a layers panel give you the same control.
Keep a reference photo handy on your phone or another screen. Even a quick look at the side profile of a leaf blower helps you check the angles. You are not copying it exactly. You are just using it to keep your proportions honest.
Picking the Right Reference Angle
A side view is the easiest angle for beginners. You can see the full length of the nozzle and the shape of the motor housing clearly. A front view hides the nozzle length, which makes proportions trickier. We recommend the side profile for your first attempt. It shows the most important parts without confusing perspective.
Once you get comfortable with the side view, you can try a three-quarter angle. That adds depth but also adds complexity. Save that for later after you nail the basics.
Mapping Out the Basic Silhouette
Begin with light, soft pencil strokes. Press gently so you can erase mistakes without leaving marks. Start by drawing a long, slightly tapered rectangle for the nozzle. This rectangle should extend from the front of the motor housing. Keep it straight for now; you can add curves later.
Next, draw a larger shape for the motor housing. This is usually a rounded square or an oval sitting behind the nozzle. We found that thinking of it like a small barrel works well. The motor holds the fan and the engine, so it is the widest part of the machine.
Leave a gap between the nozzle and the motor if you need to adjust sizes. You can connect them once you are happy with the placement. This step is all about getting the big shapes down before any details appear.
Setting the Right Proportions
The nozzle is typically one and a half to two times the length of the motor housing. Many beginners draw the nozzle too short. That makes the blower look stubby and unbalanced. Measure with your eye or use the pencil as a rough guide. Place your pencil on the paper to compare the lengths visually.
If you are drawing a backpack-style blower, the proportions shift. The motor sits on the back, and a flexible hose connects to the nozzle. That is a different beast. For a handheld model, the straight-line approach works best. Keep the nozzle long and the motor compact.
Using Guide Lines for Symmetry
A light vertical line down the center of the motor helps you keep the shape even. You can also draw a horizontal line to mark where the handle sits. These guides are your safety net. They keep the drawing from drifting off to one side. Erase them later once you add the final details.
We found that using a ruler for these guide lines saves time. You can draw them lightly and they disappear under the final shading. Do not skip this step. It is the difference between a balanced sketch and one that looks lopsided.
Adding the Handle and Control Features
The handle is your next big piece. On most handheld blowers, the handle sits on top of the motor housing. It looks like a curved loop or a D-shape. Draw a simple arc that rises above the motor and connects back down on both sides. Keep the grip area slightly thicker than the rest of the loop.
Some models have a second, smaller handle near the nozzle for extra control. If you want a more detailed drawing, add that too. This smaller handle is usually a straight or slightly angled bar. It gives the user a second handhold for balance.
Do not forget the trigger. The trigger sits right where your finger would naturally rest on the main handle. A small curved rectangle works well. Place it on the underside of the main handle loop.
Placing the Trigger and Controls
The trigger is a simple shape, but its position matters. It should be on the lower front part of the handle. That is where your index finger wraps around. Draw it as a small, rounded rectangle that angles slightly downward. Add a thin line to show the separation between the trigger and the handle body.
Some blowers have a speed dial or a lock button. You can add these as tiny circles or small rectangles near the trigger. These details make your drawing look more like the real tool. They also give you something to shade and add depth to later.
Drawing the Nozzle and Air Opening
Now you get to shape the nozzle. The nozzle usually has a slight taper. It is wider where it connects to the motor and narrower at the tip. Draw a second line inside your original rectangle to create that taper. The difference might be subtle, but it adds realism.
At the very end of the nozzle, draw the air opening. This is a small circle or an oval shape that shows the exit point for the air. On some models, the opening has a flat, slotted design. You can draw a few short vertical lines inside the opening to suggest the slots. This is a small detail that makes a big difference.
Adding the Air Intake Vents
Flip your attention back to the motor housing. Most blowers have a series of vents or slits on the side. These vents let air in and keep the engine cool. Draw three or four short, parallel lines on the side of the motor. They usually curve slightly to follow the shape of the housing.
We found that placing these vents near the back of the motor works well. That is where the engine sits on most models. Keep them evenly spaced and follow the contour of the housing. If you draw them too close together, they look like a mess. A little spacing goes a long way.
Including the Fan Housing Details
The fan housing is the round part at the base of the motor. It often has a circular ridge or a few concentric circles. Draw one or two thin circles around the center of the fan area. This gives the impression of a rotating fan inside. Add a small center hub to complete the effect.
This detail is optional for a cartoon style but essential for a realistic look. The fan housing connects the motor to the nozzle. It is a natural focal point for the eye. Take your time here and make the circles clean.
Refining the Lines and Cleaning Up the Sketch
Now that all the pieces are in place, it is time to make the drawing look crisp. Go over your pencil lines with a firmer stroke. Trace the final shape of the nozzle, the motor, and the handle. Ignore the rough guide lines and the extra marks you made earlier.
Use an eraser to remove the light guide lines and any stray marks. Be gentle so you do not smudge the darker lines you just drew. This cleanup step transforms a messy sketch into a confident drawing. It is like tidying up your desk before a big presentation.
Check the overall balance at this point. Stand back and look at your work. Does the nozzle look too long? Is the handle too small? Now is the time to fix those issues before you add shading.
Deciding Between Cartoon and Realistic Styles
If you want a cartoon style, keep your lines bold and simple. Use thick outlines and avoid too much detail. Exaggerate the size of the nozzle or the handle for a fun, playful look. Cartoon blowers often have big, chunky shapes that are easy to recognize.
For a more realistic approach, focus on accurate proportions and smooth curves. Study how the plastic parts flow into each other. Keep your lines light and subtle. Realistic drawings rely on shading and texture more than heavy outlines. Choose your path now so you know how to finish the drawing.
Adding Shading and Depth for a 3D Look
Shading is what makes a flat drawing pop off the page. Pick a light source direction first. If the light comes from the top left, the shadows go to the bottom right. Keep this consistent across the entire drawing. Inconsistent shading confuses the eye and ruins the illusion of depth.
Start with the darkest areas. The underside of the handle and the bottom edge of the motor usually get the most shadow. Use the side of your pencil to fill these areas with a soft gray tone. Then build up the darkness gradually. You can always add more, but it is hard to remove.
Using Cross-Hatching or Smooth Blending
There are two simple ways to shade: cross-hatching and blending. Cross-hatching uses overlapping lines to create darker tones. It is fast and gives a nice sketchy feel. Blending uses a finger, a tissue, or a blending stump to smear the graphite into a smooth gradient. That looks more polished and realistic.
We found that a combination works best. Use smooth blending for the large surfaces like the motor housing. Then add a few cross-hatched lines near the vents and the nozzle tip. The contrast between the two techniques adds visual interest.
Highlighting the Plastic Parts
Plastic has a slight shine to it. You can show this by leaving a small white area untouched near the top of the motor. This is called a highlight. It tells the viewer that the light is reflecting off the surface. Do not overdo it. One or two small highlights are enough.
Add a subtle highlight along the top edge of the nozzle as well. This makes the plastic look curved and smooth. Keep the highlight clean and sharp. If it gets smudged, use a clean eraser to pick out the white space again.
Common Mistakes to Avoid When Drawing a Leaf Blower
Even with a good guide, mistakes happen. The most common one we see is drawing the nozzle too short. That makes the whole machine look like a toy. Fix this by measuring the nozzle against the motor length before you commit to the final line. A long, tapered nozzle reads as a real leaf blower instantly.
Another frequent issue is placing the handle too far forward or too far back. The handle should sit near the center of gravity, which is close to the motor. If the handle looks off, compare it to a reference photo. Adjust the position early, and the drawing will feel balanced.
Beginners also forget the air intake vents. Without them, the motor looks like a blank box. Those simple slits add a lot of mechanical character. Always include at least three or four lines to suggest airflow.
Fixing Proportion Errors Quickly
If you catch a proportion error, do not panic. Use your eraser to remove the offending section and redraw it. It is that simple. Sketching is all about trial and error. Even professional artists redraw parts of their work many times. You are not failing; you are refining.
Use your reference photo as a guide. Compare your drawing to the photo and note the differences. Fix the biggest difference first, usually the nozzle length or the motor size. Small tweaks after that will fall into place.
Adding Final Details and Texture
The last step is all about the small touches. Add a few dots or small circles for screws or bolts on the motor housing. Draw a thin line to separate the plastic casing pieces. These tiny details make the drawing look manufactured and real. They show the viewer that you paid attention.
You can also add a subtle texture to the grip area of the handle. Use a few short, parallel lines to suggest a rubber texture. This breaks up the smooth plastic look and adds realism. Keep these lines light and consistent.
If you want to add a little context, sketch a few leaves blowing away from the nozzle. It is a simple way to show the tool in action. It also fills empty space in your composition and makes the drawing more dynamic.
Quick Reference Checklist for Your Drawing
- Long, tapered nozzle that is about 1.5 to 2 times the motor length
- Bulky motor housing with a rounded or oval shape
- Curved D-shaped handle on top of the motor
- Small trigger on the underside of the main handle
- Air intake vents with three to four parallel slits
- Air opening with slots at the end of the nozzle
Conclusion
Drawing a leaf blower comes down to seeing the basic shapes first. You start with a long nozzle and a bulky motor, then build out the handle and the small details. We found that getting the proportions right is the biggest win. Keep the nozzle about one and a half to two times the length of the motor, and your sketch will instantly look balanced.
Remember to keep your early lines light and your eraser close by. Shading adds the final depth that turns a flat doodle into a convincing drawing. You do not need to be perfect on the first try. Grab your pencil, follow the steps one more time, and sketch a quick version from memory. That practice is what locks in the skill.
Frequently Asked Questions
What is the easiest way to draw a leaf blower for beginners?
Start with the side profile. Draw a long, tapered rectangle for the nozzle and a rounded square for the motor. Add the handle as a simple loop on top. Use light lines so you can fix mistakes easily before adding any details.
How do you make a leaf blower drawing look realistic?
Focus on accurate proportions and smooth curves. Pay attention to how the plastic parts connect. Add shading with a consistent light source. Small details like vents and a trigger make a big difference for realism.
What are the most common mistakes when drawing a leaf blower?
Drawing the nozzle too short is the biggest issue. It makes the blower look stubby. Placing the handle in the wrong spot is another common problem. Forgetting the air intake vents leaves the motor looking like a blank box.
Can I draw a leaf blower without a reference picture?
Yes, you can, but a reference photo helps a lot. It keeps your proportions honest and shows you where the small parts go. We recommend keeping one on your phone. Even a quick glance helps you check the angles and the handle position.
How long does it take to learn to draw a leaf blower well?
Most people see big improvement after two or three practice sketches. The first attempt gets the basic shapes down. The second helps you fix proportions. By the third try, you will feel comfortable adding shading and details. Practice is the real key here.